Good travel photos often depend less on expensive equipment than on a clear understanding of how a camera handles light. Whether you use a smartphone, a compact camera or a mirrorless body, a handful of settings can make a noticeable difference. This guide explains the core controls, how to use them in common travel situations and how to photograph people and places respectfully.
Understanding exposure
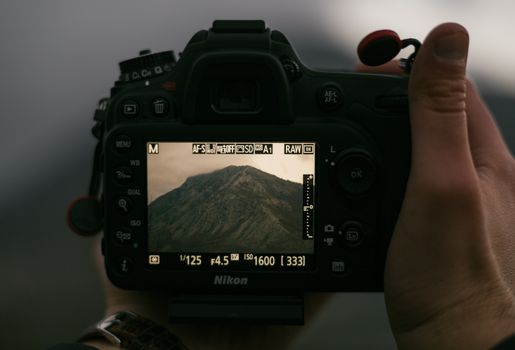
Exposure is the amount of light that reaches the sensor, and it is controlled by three settings: aperture, shutter speed and ISO. Aperture determines how wide the lens opening is, which affects brightness and depth of field. Shutter speed controls how long the sensor is exposed, which determines whether motion appears sharp or blurred. ISO sets the sensitivity of the sensor, and higher values brighten images but can add visible noise.
Many travelers find it easiest to start with aperture priority mode, where you choose the aperture and the camera selects the shutter speed. Manual mode gives full control and is worth practicing once you are comfortable with the basics. Check your camera's manual for exact menu names, since they vary by brand.
Aperture, depth of field and focus
A wide aperture, indicated by a small f-number, produces a shallow depth of field, which blurs the background and draws attention to a subject. A narrower aperture keeps more of the scene sharp, which suits landscapes, street scenes and architecture. For group photos or wide vistas, a moderate aperture often gives a good balance.
Focus matters as much as aperture. Use the focus point on your subject, especially for portraits, and check that eyes are sharp when photographing people. In low light, an autofocus assist light or manual focus can help.
Shutter speed, motion and low light
Fast shutter speeds freeze action, such as markets, waves and moving transport. Slower speeds create motion blur, which can add a sense of movement to a street scene or a waterfall. Handholding is generally reliable at speeds around the reciprocal of the focal length, so a 50 millimeter lens is usually comfortable at about 1/50 second, though image stabilization can extend this range. A tripod or stable surface helps for longer exposures at dusk or in dim interiors.
In low light, raising ISO is often preferable to a blurry image. Modern cameras handle higher ISO well, and noise reduction can be applied in editing software.
White balance, RAW files and light
White balance tells the camera what color counts as white, which affects how warm or cool a photo looks. Auto white balance works in many situations, but mixed lighting, such as street lamps combined with daylight, can produce odd color casts. Setting white balance to a preset for sunlight, shade or tungsten light can help, and shooting RAW files gives you flexibility to adjust color later without losing as much quality.
Light changes the mood of a scene more than any setting. Soft morning and late afternoon light, often called golden hour, tends to flatter landscapes and people. Overcast days produce even light that suits detailed architecture and textures. Harsh midday sun can create strong shadows, so look for shade, reflections or subjects framed against open sky.
Photographing people and communities
Travel photography involves people as well as places. Ask permission before photographing individuals, especially close-ups, and be willing to accept a polite refusal. Some communities have customs about being photographed, and certain sites, religious ceremonies and private homes may be off limits. Respecting these boundaries builds trust and produces more genuine images.
Consider sharing photos with the people you take them of when possible, and avoid capturing people in vulnerable moments. Ethical photography treats subjects as participants rather than props.
Practical tips
Keep your camera charged and carry a spare memory card, since travel days are often longer than expected. Use a lens cloth to clean the front element regularly, as dust and fingerprints reduce contrast. Shoot a few test frames when you arrive somewhere new to check exposure and color. Back up your files each evening to a second device or cloud storage.
Learn your camera's basic menus before the trip rather than during a busy moment. Practice with the settings at home, and note which combinations work for your favorite subjects.
Common mistakes to avoid
A frequent error is chasing a single famous viewpoint and photographing it the same way as thousands of others. Look for angles, details and people that tell a fuller story about the place. Another mistake is relying too heavily on digital zoom, which reduces image quality, rather than moving closer or choosing a different lens. Some travelers use flash in dim interiors, including religious spaces where flash may be prohibited because it can disturb the atmosphere and damage fragile surfaces. Photographing only at the most popular time of day also limits your options, since many scenes change considerably in softer or more overcast light. Finally, forgetting to check the horizon and edges of the frame can leave images looking tilted or cluttered. Take a moment to scan the corners before pressing the shutter.
Who this suits and who it doesn't
Smartphone users who want better results without carrying a full kit may find that many of these principles apply directly to their devices. Travelers who prefer to pack light will appreciate that good exposure and composition often matter more than extra equipment. Dedicated cameras may suit people who want more control over depth of field and low-light performance, and who are happy to carry additional lenses. This approach may be less suitable for people who want to take photographs quickly without thinking about settings, or for those who expect polished results from editing alone. If you are primarily traveling to participate in activities rather than photograph them, a simple camera or phone setup may be the more relaxing choice. Whichever tool you use, deciding in advance how you want your pictures to look helps you choose settings more quickly.
Quick questions
Do you need a tripod for travel photography? Not always. A tripod helps for long exposures and night scenes, but many daytime photos can be taken handheld with a steady stance and a sensible shutter speed. Resting the camera on a wall or bag can also work well for steady shots.
Is it better to shoot in video or stills? It depends on your goal. Stills are better for capturing a single moment in detail, while video can record movement and sound that photos cannot convey.
Should you delete images you think are weak? Consider keeping them until you have reviewed the set at home. Some frames that seem unremarkable on a small screen can look better on a larger display.
Strong travel photos come from understanding light, making deliberate choices about exposure and focus, and treating people with care. You do not need to master every setting to improve. Start with the controls that matter most, practice them in everyday situations, and let your photographs reflect the places and people you encounter.