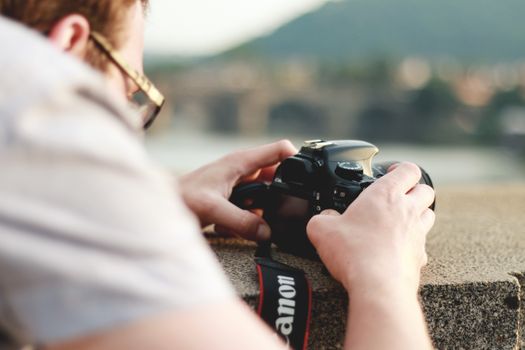
The air was thick with the scent of jasmine and the distant hum of a vespa. I stood on a tiny, ancient bridge in Venice, the Grand Canal stretching out before me, awash in the soft, golden glow of a late afternoon sun. A gondola, laden with singing tourists, glided into view, perfectly framed by a crumbling archway. It was the shot. My heart pounded with the thrill of it. I lifted my camera, took a deep breath, and… click.
Later, back in my tiny Airbnb, I scrolled through my day's captures. The Venice shot? A blurry, overexposed mess. The gondola was a ghost, the sun a blown-out white blob. My heart sank faster than a poorly parked scooter in a canal. I had seen the magic, felt the moment, but my camera had utterly failed to translate it.
That moment in Venice was my wake-up call. I realized that merely owning a "good" camera wasn't enough. To truly capture the soul of a place, to freeze those fleeting, incredible moments in time, I needed to understand the language my camera spoke. I needed to master its settings.
Fast forward years later, and I’ve chased sunrises over ancient temples in Bagan, frozen the spray of crashing waves in Hawaii, and immortalized the vibrant chaos of a Moroccan souk, all with my trusty camera. The difference? I learned the secrets. I’ve discovered the camera settings that don't just take pictures, but create memories – the kind you’ll want to print, frame, and revisit for a lifetime. And today, I’m sharing those secrets with you.
This isn't just a technical guide; it's an invitation to unlock the true potential of your travel photography. These are the settings, the techniques, and the mindset shifts that will elevate your photos from good to absolutely unforgettable. Get ready to experience travel photography like never before.
1. The Holy Trinity: Aperture, Shutter Speed, ISO – Your Manual Mode Masterclass
Forget "auto" mode. Seriously, banish it from your vocabulary. To truly control your image, you need to understand the exposure triangle: Aperture, Shutter Speed, and ISO. These three settings work in concert, determining how bright or dark your photo is, how much of it is in focus, and whether motion is frozen or blurred.
- Aperture (f-stop): This controls the size of the lens opening, much like the pupil of your eye. A low f-number (e.g., f/1.8, f/2.8) means a wider opening, letting in more light and creating a shallow Depth of Field (DoF). This is your secret weapon for those dreamy, blurred backgrounds (bokeh) in portraits or close-ups of street food. Think of that stunning shot of a vibrant spice market stall in Marrakech, with a single, perfectly sharp tagine in the foreground and the bustling background softly out of focus. For landscapes, however, you want everything sharp, so you'll use a high f-number (e.g., f/8, f/11, f/16) to ensure a deep DoF, capturing every detail of, say, the epic Cliffs of Moher in Ireland.
- Actionable Tip: For portraits or food shots, start with f/2.8 or f/4. For expansive landscapes, try f/8 to f/11.
- Personal Anecdote: I once tried to photograph a charming old fisherman in Santorini using f/1.8. The result? His eyes were sharp, but his nose and the beautiful blue dome behind him were blurry. I adjusted to f/4, and suddenly, his weathered face and the iconic whitewashed village were both perfectly in focus, telling a richer story.
- Shutter Speed: This is how long your camera's shutter stays open, letting light hit the sensor. A fast shutter speed (e.g., 1/1000s, 1/2000s) freezes motion – perfect for capturing that fleeting smile of a child in Vietnam, a bird mid-flight, or the exhilarating splash of a waterfall in Iceland. A slow shutter speed (e.g., 1/30s, 1s, 30s) allows motion blur, which can be incredibly artistic. Think silky smooth waterfalls, light trails from cars on a bustling Tokyo street, or ethereal clouds drifting over a mountain range.
- Actionable Tip: For freezing people or moderate action, aim for 1/250s or faster. For truly fast subjects (sports, wildlife), go 1/1000s+. For motion blur, start at 1/30s and go slower, using a tripod.
- Personal Anecdote: My first attempt at a long exposure waterfall shot in Plitvice Lakes, Croatia, was a disaster. I hand-held the camera at 1/2 second. Everything was blurry! It wasn't until I invested in a lightweight travel tripod and set my shutter to a full 2 seconds that I achieved that magical, milky water effect.
- ISO: This controls your camera sensor's sensitivity to light. A low ISO (e.g., 100, 200) produces the cleanest, most noise-free images – ideal for well-lit conditions. A high ISO (e.g., 1600, 3200, 6400) makes your sensor more sensitive, allowing you to shoot in low light without a flash, but at the cost of introducing "noise" or graininess into your photos.
- Actionable Tip: Always try to keep your ISO as low as possible for the best image quality. Only increase it when absolutely necessary to get a proper exposure, like in a dimly lit temple or a night market.
- Personal Anecdote: I was once inside a stunning, but very dark, temple in Kyoto. Without a tripod, my only option was to crank up the ISO to 3200. The resulting image had some noise, but it was still a powerful, evocative shot, far better than a blurry mess or nothing at all! Modern cameras handle high ISO much better than older models, so don't be afraid to experiment.
2. Mastering Light: Golden Hour, Blue Hour & Low Light Magic
Light is the photographer's best friend. Understanding how to work with it, rather than against it, is paramount.
- Golden Hour: This is the magical period shortly after sunrise and before sunset. The sun is low in the sky, casting a warm, soft, diffused light that is incredibly flattering. Shadows are long and atmospheric. This is prime time for portraits, landscapes, and architectural shots. The light in Positano, Italy, during golden hour is legendary for a reason!
- Settings: Use Aperture Priority mode (Av or A) and let the camera choose the shutter speed, or shoot manual. Keep ISO low (100-400). You might even slightly underexpose (-0.3 to -0.7 EV) to retain highlight detail and deepen those warm tones.
- Personal Anecdote: I once woke up at 4 AM to catch the sunrise over Angkor Wat in Cambodia. The light that emerged was pure gold, transforming the ancient stones into a breathtaking spectacle. By using Aperture Priority and slightly underexposing, I captured the temple silhouetted against the fiery sky, and then, as the sun rose higher, the intricate details bathed in that incredible warmth. It was truly a "before you die" moment.
- Blue Hour: This period occurs just after sunset and before sunrise, when the sky turns a deep, rich blue. City lights begin to twinkle, creating a stunning contrast. It’s perfect for cityscapes, skylines, and architectural photography.
- Settings: You’ll definitely need a tripod here. Use a low ISO (100-200), a mid-range aperture (f/8-f/11) for sharpness, and a longer shutter speed (from a few seconds to 30 seconds or more, depending on ambient light).
- Personal Anecdote: Capturing the iconic Sydney Opera House and Harbour Bridge during blue hour, with the city lights reflecting on the water, was a dream. My tripod was essential, allowing me to use a 15-second exposure that smoothed out the water and made the lights pop like diamonds.
- Low Light/Night Photography: Beyond blue hour, when the world plunges into darkness, new photographic opportunities arise. Think vibrant street markets, starry skies, or dramatic cityscapes.
- Settings: Again, a tripod is crucial. Keep ISO as low as possible while still achieving a decent exposure (you might push to 800-1600 for cityscapes, or even higher for astrophotography). Aperture around f/8 for sharpness. Shutter speed will be long, from several seconds to minutes. For astrophotography, use a wide aperture (f/2.8 or wider) and a higher ISO, with shutter speeds around 15-30 seconds (using the 500 rule to avoid star trails).
- Personal Anecdote: Wandering through the night markets of Bangkok, I found myself in a vibrant maze of food stalls and neon signs. Without a tripod, I had to rely on pushing my ISO to 3200 and shooting with a wider aperture (f/2.8) to get enough light. The images had a bit of grit, but they perfectly conveyed the energetic, slightly chaotic atmosphere of the market.
3. Composition is Key: Beyond the Rule of Thirds
While not strictly camera settings, composition is how you arrange elements within your frame, and it's intrinsically linked to how you use your lens and camera. The most technically perfect photo can fall flat without strong composition.
- Rule of Thirds: Imagine your frame divided into nine equal sections by two horizontal and two vertical lines. Place your subject or points of interest along these lines or at their intersections. It creates visual balance and interest. I use this constantly, whether I'm aligning a distant mountain peak in Patagonia or placing a local street vendor in a bustling Havana street scene.
- Leading Lines: Use natural or artificial lines (roads, rivers, fences, walls, even shadows) to draw the viewer's eye into and through your image, leading to your main subject. This is incredibly effective in architectural photography, like the sweeping arches of the Roman Colosseum, or the endless pathways of a rice terrace in Bali.
- Framing: Use natural frames (doorways, windows, tree branches, archways) to "frame" your subject. This adds depth and context. I once captured a stunning shot of the Eiffel Tower perfectly framed by the intricate ironwork of a Parisian balcony.
- Symmetry and Patterns: Look for repetitive elements or perfect reflections. This creates a sense of harmony and visual appeal. The reflections in the tranquil waters of Lake Louise in Canada, or the intricate patterns in a mosaic in Seville, are prime examples.
- Fill the Frame: Sometimes, getting up close and personal, filling the frame with your subject, creates a powerful, intimate image. This is fantastic for detailed portraits or vibrant close-ups of food or crafts.
- Actionable Tip: Don't just point and shoot. Take a moment to look around your subject. Are there leading lines? Can you frame it? Try shooting from different angles – low, high, wide, tight.
- Personal Anecdote: I was in Chefchaouen, Morocco, the famous Blue City. Every alleyway was a photo op. Instead of just shooting down a street, I noticed a beautiful archway. I waited for a local cat to walk through it, framed it perfectly, and got one of my most shared Instagram photos. It wasn't about the settings, but about seeing the composition.
4. Action & Movement: Freezing Time or Blurring Beauty
Travel is dynamic. Things move – people, animals, vehicles, water. Knowing how to capture that movement, or intentionally blur it, is a game-changer.
- Freezing Action: As mentioned with shutter speed, a fast shutter is your friend.
- Settings: Shutter Priority mode (Tv or S) is excellent here. Set your shutter speed (e.g., 1/500s to 1/2000s) and let the camera handle aperture and ISO. For very bright conditions, you might need a low ISO and a narrow aperture. For dimmer conditions, you might need to increase ISO or widen aperture.
- Personal Anecdote: On a safari in Tanzania, a cheetah suddenly bolted across the savanna. With my shutter speed set to 1/1600s, I managed to freeze its incredible speed, every muscle defined, the dust kicking up behind it. It was exhilarating!
- Creating Motion Blur: This is where things get artistic.
- Settings: Manual mode or Shutter Priority. You'll need a slower shutter speed (1/30s down to several seconds or even minutes). A tripod is almost always essential to keep the non-moving elements sharp. For bright daylight, you might also need a Neutral Density (ND) filter to reduce the amount of light entering the lens, allowing for those long exposures without overexposing your image.
- Personal Anecdote: Capturing the iconic "light trails" from cars on the Shibuya crossing in Tokyo was a challenge. I set my camera on a mini-tripod, used an ND filter, an aperture of f/11, and a shutter speed of 10 seconds. The result was a mesmerizing swirl of red and white light, contrasting with the sharp, static buildings.
5. Beyond the Basics: White Balance, Focus Modes & Drive Modes
These often-overlooked settings can dramatically impact the final look and feel of your images.
- White Balance (WB): This adjusts the color temperature of your image, ensuring whites look white and colors are accurate. Different light sources (sunlight, fluorescent, tungsten) have different color casts. Your camera has presets (Daylight, Cloudy, Shade, Tungsten, Fluorescent, Flash).
- Actionable Tip: While auto white balance (AWB) is generally good, don't be afraid to experiment. For example, setting WB to "cloudy" on a sunny day can add a beautiful warmth to your photos, especially at golden hour. Or, for ultimate control, shoot in RAW (more on that later) and adjust WB in post-processing.
- Personal Anecdote: I once shot an entire series of photos inside a beautiful blue mosque in Istanbul, only to realize later that the auto white balance made everything look too cool and sterile. A quick adjustment to "Tungsten" or a custom setting in Lightroom brought out the true warmth and intricate details of the interior.
- Focus Modes: How your camera achieves focus.
- Single-Shot AF (AF-S/One-Shot AF): Focuses once when you half-press the shutter, then locks. Perfect for stationary subjects like landscapes or portraits.
- Continuous AF (AF-C/AI Servo AF): Continuously adjusts focus as your subject moves. Essential for moving subjects like wildlife, children playing, or street performers.
- Manual Focus (MF): You control the focus ring. Useful for very precise focusing (macro, astrophotography) or when autofocus struggles in very low light or busy scenes.
- Actionable Tip: Use AF-S for static scenes (e.g., a serene lake in Switzerland). Switch to AF-C for dynamic moments (e.g., a street dancer in Barcelona).
- Personal Anecdote: Trying to capture a puffin taking off from a cliff edge in Iceland with AF-S was a nightmare. The moment I switched to AF-C, the camera tracked the bird perfectly, giving me several sharp shots as it launched into the air.
- Drive Modes: How your camera takes multiple shots.
- Single Shot: Takes one photo per shutter press.
- Continuous High/Low (Burst Mode): Takes multiple photos rapidly. Invaluable for capturing action, ensuring you get "the shot."
- Self-Timer: Delays the shutter release. Great for self-portraits (with a tripod!) or to avoid camera shake when using a tripod for long exposures.
- Actionable Tip: Use burst mode when photographing anything unpredictable – street life, children, animals, or even candid moments to ensure you don't miss that perfect expression.
- Personal Anecdote: I was trying to get a jumping shot in front of the pyramids in Giza. With single shot, I kept missing the peak of the jump. Switching to burst mode, I got a sequence of about 10 shots, one of which was absolutely perfect – mid-air, arms outstretched, pure joy!
6. Gear Up Smart: Don't Let Your Kit Hold You Back (or Weigh You Down!)
While this post is about settings, the right gear enables you to use those settings effectively. You don't need a massive, expensive kit, but a few smart choices can make all the difference.
- Lenses:
- Versatile Zoom (e.g., 24-70mm or 24-105mm): A workhorse for most travel situations.
- Wide-Angle (e.g., 16-35mm): Essential for grand landscapes, tight city streets, and dramatic architecture.
- Telephoto (e.g., 70-200mm or 100-400mm): For wildlife, compressing distant elements, or capturing details from afar.
- Prime Lens (e.g., 50mm f/1.8 or 35mm f/1.8): Small, light, incredibly sharp, and fantastic in low light with beautiful bokeh. A 50mm f/1.8 is often called the "nifty fifty" and is an affordable way to get stunning portrait-style shots.
- Tripod: Non-negotiable for long exposures, low light, and self-portraits. Invest in a lightweight, sturdy travel tripod. Brands like Peak Design, Manfrotto BeFree, or Sirui offer excellent options.
- Filters:
- Polarizer (CPL): Reduces glare (water, glass), deepens blue skies, and enhances saturation. A must-have for vibrant landscapes.
- Neutral Density (ND) Filters: Like sunglasses for your lens, allowing you to use slower shutter speeds in bright light for motion blur effects.
- Extra Batteries and Memory Cards: Never run out of juice or space!
- Protective Bag/Backpack: Keep your gear safe and accessible. Look for weather-sealed options.
- Actionable Tip: Before any trip, lay out your gear. Do you really need that heavy telephoto for a city break? Prioritize versatility and portability.
- Personal Anecdote: I once lugged a massive backpack with three heavy lenses through the narrow, cobbled streets of Rome. My back ached, and I missed shots because I was too tired to swap lenses. Now, for city trips, I often just take a versatile zoom and a lightweight prime lens, and I'm much happier (and more agile!).
The Final Shot: Practice, Experiment, and Embrace the Journey
Learning these settings isn't a one-time event; it's a continuous journey. The best camera setting is always the one that best captures your vision in that specific moment.
Start by focusing on one setting at a time. Go out in your local park, practice with aperture to get different depths of field. Then try shutter speed, freezing a running dog or blurring moving cars. The more you practice, the more intuitive it becomes. Soon, you won't be thinking about the numbers; you'll be thinking about the feeling you want to convey, and your fingers will instinctively know what to adjust.
Travel photography is about more than just technical perfection; it's about telling a story, evoking emotion, and preserving the magic of your adventures. These camera settings are your brushstrokes, your tools to paint those stories with light.
So, pack your bags, charge your batteries, and go out there. Explore. Discover. And most importantly, create. Capture those perfect travel photos that will transport you back to those unforgettable moments, long after the journey ends.
What's the one camera setting you're most excited to master on your next adventure? Share your thoughts and your favorite travel photo tips in the comments below! And don't forget to share this guide with your fellow wanderlusters!
---