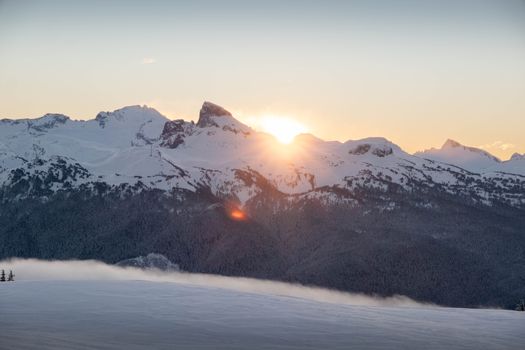
The Secret Dawn: Unveiling Mountain Peaks Instagram Influencers Don't Want You To Know
The alarm blares at 3 AM. Your eyes peel open reluctantly, but a thrill courses through you. Today, you're chasing the sun. You've seen the iconic shots – Machu Picchu veiled in mist, the Dolomites glowing orange, Everest catching the first light. Beautiful, yes. But often, those picture-perfect moments come with a side of jostling elbows, selfie sticks, and the disheartening realization that hundreds of other photographers are vying for the exact same frame.
I’ve been there. I once hiked for hours to a "secret" viewpoint in a popular national park, only to arrive and find a line of tripods already set up, a drone buzzing overhead, and a group of influencers doing synchronized yoga poses as the sun timidly peeked over the horizon. My heart sank. The magic was gone, replaced by a sense of manufactured experience. That’s when I vowed to seek out the true hidden gems, the peaks that demand a little more effort, a touch more grit, but reward you with an intimacy and authenticity that no filter can replicate.
This isn't about shaming anyone's travel style. It's about reclaiming the raw, breathtaking wonder of a mountain sunrise. It's about finding those moments where the world feels like it's unfolding just for you. So, if you're ready to trade the crowds for unparalleled views, the generic for the genuinely unique, and capture sunrise photos that tell a story beyond a trending hashtag, then lean in close. Because I'm about to share five mountain peaks that Instagram influencers (the ones chasing easy likes, anyway) probably don't want you to know about. These are the spots where the journey is as epic as the destination, and your photos will carry the weight of a true adventure.
1. Mount Assiniboine Provincial Park, British Columbia, Canada: The Matterhorn of the Rockies’ Secret Viewpoint
Why it’s special: Often called the "Matterhorn of the Rockies," Mount Assiniboine is undeniably stunning. However, its remoteness is its greatest filter. Accessible primarily by a multi-day hike (often 3-4 days round trip) or a scenic helicopter ride, it deters the casual day-tripper and the influencer looking for a quick, easy shot. The reward? Pristine alpine lakes reflecting colossal peaks, vast meadows, and sunrises that paint the sky in hues you'll swear are Photoshopped. My personal favorite viewpoint for sunrise isn't the commonly photographed Magog Lake, but rather the slightly more challenging scramble up to Sunburst Lake in the pre-dawn darkness. From there, you get a unique, elevated perspective of Assiniboine towering over the valley, often with mist rising from the lake below.
My experience: I remember my first time trekking to Assiniboine. The final push to the lodge felt endless, but waking up at 4 AM, flashlight strapped to my head, and making my way to Sunburst Lake was an almost spiritual experience. The air was crisp, carrying the scent of pine. As the first rays kissed the jagged summit of Assiniboine, turning its icy face from steely blue to fiery orange, I literally gasped. There was no one else around. Just me, my camera, and the vast, silent Canadian wilderness. The reflections in the still lake were mirror-perfect, creating a symmetrical masterpiece. It was a moment of pure, unadulterated awe.
Practical Tips & Details:
- Getting There: You can hike in from Mount Shark (Alberta side, ~27 km one-way) or from Sunshine Village (Alberta, ~29 km one-way). Alternatively, book a helicopter flight directly to Assiniboine Lodge from Canmore or Mount Shark (prices vary, but expect CAD$200-300+ one-way).
- Accommodation: Assiniboine Lodge (reservations essential, expensive but charming) or multiple campsites (Magog Lake, Og Lake – require permits booked months in advance via BC Parks).
- Best Time: Late July to early September for wildflowers and stable weather.
- Photography Advice: A wide-angle lens (16-35mm) is essential for capturing the grandeur. Don't forget a telephoto (70-200mm) for isolating details on Assiniboine's peak as the light changes. A sturdy tripod is non-negotiable for low-light shots and long exposures to smooth out lake reflections. Pack extra batteries – the cold drains them quickly.
- Cost Estimate: If hiking and camping, expect to pay for permits (around CAD$10/night) and food. Helicopter is a significant additional cost.
2. Ulsanbawi, Seoraksan National Park, South Korea: Granite Giants Bathed in Gold
Why it’s special: Seoraksan is one of South Korea's most stunning national parks, known for its dramatic granite peaks and vibrant autumn foliage. While popular, many visitors stick to the cable car or shorter trails. The hike to Ulsanbawi (Ulsan Rock) is a formidable ascent involving over 800 steps near the summit, making it a challenging pre-dawn climb. The reward is a panoramic view of colossal rock formations, often wreathed in mist, catching the first golden rays of the sun as it rises over the East Sea. It's a truly humbling experience, revealing a different, rugged side of Korea.
My experience: I embarked on the Ulsanbawi sunrise hike after a recommendation from a local hiker. Starting in the dark, the rhythmic crunch of my boots on the gravel path was the only sound for a long time, eventually joined by the rush of a mountain stream. The final ascent up those metal stairs felt like climbing to the heavens, my legs burning. But then I reached the top. Just as the sky began to blush, the massive granite spires of Ulsanbawi slowly emerged from the gloom, looking like ancient titans. As the sun crested the horizon, it painted them in a fiery orange-gold, highlighting every fissure and crevice. I remember leaning against the railing, completely out of breath, but filled with an overwhelming sense of accomplishment and wonder. The few other hikers who made it up that early shared quiet smiles and respectful silence, all captivated by the unfolding spectacle.
Practical Tips & Details:
- Getting There: Seoraksan National Park is accessible by bus from Seoul (Dongseoul Bus Terminal to Sokcho, then local bus to the park entrance). The Ulsanbawi trail starts near the main park entrance.
- Accommodation: Sokcho city offers various hotels and guesthouses. There are also guesthouses closer to the park entrance.
- Best Time: Spring (April-May) for clear skies and fresh air, or Autumn (October-November) for stunning fall colors, though it can be colder.
- Photography Advice: A wide-angle is great for the panoramic views from the top. A telephoto can isolate individual rock formations as they light up. Be prepared for strong contrasts between the bright sky and shadowed rocks; bracketing exposures is highly recommended. The pre-dawn blue hour offers incredible moodiness.
- Cost Estimate: Park entrance fee (around KRW 3,500). Bus fares from Seoul (around KRW 20,000 one-way).
3. Rax-Schneeberg Group, Lower Austria, Austria: Alpine Serenity Above the Clouds
Why it’s special: While the Austrian Alps conjure images of Tyrol and the Dolomites, the Rax-Schneeberg Group, just an hour's drive from Vienna, offers equally stunning, yet far less crowded, high-alpine experiences. This area is a local favorite, known for its vast plateau, dramatic cliffs, and easy accessibility via a historic cable car. For a truly unforgettable sunrise, a hike to a mountain hut like Habsburghaus or Ottohaus allows you to wake up above the tree line, often literally above the clouds, and witness the sun illuminating a sea of peaks.
My experience: I discovered the Rax plateau on a whim during a trip to Vienna, seeking an escape from the city. After taking the Rax cable car up the day before, I embarked on a relatively easy hike to Habsburghaus, where I'd booked a bunk. The next morning, I was up before anyone else, stepping out into the biting pre-dawn chill. Below me, the valleys were completely swallowed by a thick blanket of clouds, like a soft, ethereal ocean. As the sun began its ascent, the peaks of the Schneeberg and other surrounding mountains emerged as islands in this cloud sea, gradually turning from deep indigo to fiery orange and then soft gold. It felt like I was on top of the world, witnessing a private symphony of light and shadow. My camera clicked almost instinctively, but mostly, I just stood there, breathing it all in. The sense of peace was profound.
Practical Tips & Details:
- Getting There: Drive or take a train from Vienna to Payerbach-Reichenau, then a bus to the Rax cable car valley station (Raxseilbahn). The cable car takes you up to the plateau.
- Accommodation: Several mountain huts (e.g., Ottohaus, Habsburghaus, Karl-Ludwig-Haus) offer overnight stays. Book well in advance, especially on weekends.
- Best Time: Late spring to early autumn (May-October) for hiking. Winter offers stunning snowscapes but requires proper winter hiking gear and experience.
- Photography Advice: The "sea of clouds" phenomenon is common here, making for incredible layered compositions. Bring a wide-angle for the expansive views and a telephoto for isolating peaks emerging from the clouds. Play with silhouettes during the blue hour before the sun fully rises.
- Cost Estimate: Rax cable car return ticket (around €30). Hut stays (around €25-40/night for a bunk, excluding food).
4. Ausangate Trek, Peru: Andean Giants and Rainbow Hues Beyond Vinicunca
Why it’s special: Everyone knows Peru's Rainbow Mountain (Vinicunca) now, often teeming with tourists. However, the Ausangate Trek – a multi-day, high-altitude circuit around Mount Ausangate, one of Peru's most sacred peaks – offers even more spectacular "rainbow" landscapes and untouched Andean vistas, with a fraction of the crowds. For sunrise, you're not just looking at one colorful mountain, but entire ranges painted in vibrant mineral hues, all under the watchful gaze of the colossal Ausangate itself (6,384m / 20,945ft). My favorite sunrise spot along the trek is from a high pass overlooking the Ausangate Cocha lake, where the reflections are breathtaking.
My experience: The Ausangate trek was one of the most physically demanding but spiritually rewarding journeys I've ever undertaken. Days were spent hiking across vast, desolate plains and over high passes above 5,000m (16,400ft), often accompanied only by llamas and alpacas. Waking up at a high-altitude camp, shivering in my sleeping bag, then emerging to see the first hint of light touch the snow-capped peaks of Ausangate was an experience etched into my soul. One particular morning, from a pass above Ausangate Cocha, the sky erupted in a symphony of pinks, oranges, and purples, mirroring perfectly in the still, icy lake below. The surrounding hills, with their distinct mineral bands, caught the light in a way that made them glow from within. It was Vinicunca's beauty amplified and spread across an entire, solitary landscape. I felt a profound connection to the ancient Inca spirits rumored to inhabit these mountains.
Practical Tips & Details:
- Getting There: The trek typically starts from Tinki, a village accessible by bus or private transport from Cusco. You'll need to arrange a guided trek with mules/porters due to the high altitude and remoteness.
- Accommodation: Camping in tents provided by your trekking agency.
- Best Time: Dry season (April-October) for clearer skies, but expect cold nights.
- Photography Advice: This is high-altitude photography! Bring extra batteries (cold reduces battery life), a sturdy tripod, and filters (graduated NDs are great for balancing bright skies and dark foregrounds). Wide-angle is essential for the vast landscapes, but a telephoto can capture details of Ausangate's glaciers. Capture the indigenous people and their animals for a sense of scale and culture.
- Cost Estimate: A 4-5 day guided trek with porters, food, and equipment typically costs USD$400-800+, depending on the agency and inclusions.
5. Mueller Hut Route, Mount Cook National Park, New Zealand: Above the Clouds in Aoraki's Shadow
Why it’s special: Mount Cook (Aoraki) National Park is a jewel of New Zealand, and the Mueller Hut Route is a popular day hike. However, most people hike up and down in a day. The real secret for sunrise photographers is to stay overnight at Mueller Hut and then, for the truly dedicated, ascend slightly above the hut towards the ridge before dawn. From this elevated position, you gain an unparalleled, unobstructed view of Mount Sefton, the Mueller Glacier, and the Hooker Valley below, all bathed in the first light of day. The effort of the climb, followed by an early morning scramble, ensures only a handful of passionate photographers witness this spectacle.
My experience: I had hiked to Mueller Hut several times, always enjoying the views. But it was a conversation with a local guide that convinced me to try the pre-dawn scramble above the hut. Booking my spot at the hut months in advance, I arrived the day before, settling in amidst a mix of tired hikers. My alarm went off at 4:30 AM. Grabbing my headlamp and camera bag, I carefully picked my way up the rocky path behind the hut, the air crisp and thin. When I found my spot, the sky was a deep, inky blue. Slowly, imperceptibly at first, the jagged peaks across the valley began to define themselves. Then, a sliver of orange appeared on the horizon, expanding rapidly. Mount Sefton, directly opposite, caught the first golden light, its snow and ice glowing like a beacon. Below, the Mueller Glacier looked like a frozen river, and the clouds swirled dramatically in the valley. It was a 360-degree panorama of pure, untamed beauty. The effort, the cold, the early start – all vanished, replaced by an intoxicating sense of wonder and gratitude.
Practical Tips & Details:
- Getting There: Drive to Mount Cook Village. The Hooker Valley Track car park is the starting point for the Mueller Hut Route.
- Accommodation: Mueller Hut (operated by DOC) requires bookings well in advance, especially during peak season (NZD$45/night). It's a basic alpine hut; bring your own sleeping bag and food.
- Best Time: Summer (December-February) for warmer weather and longer daylight hours. Spring/Autumn can be beautiful but more unpredictable.
- Photography Advice: A sturdy tripod is crucial for stability on the exposed ridge. A wide-angle lens (16-35mm) is perfect for the expansive views, but a telephoto (70-200mm) will allow you to compress the peaks and capture the dramatic textures of the glaciers as the light changes. Look for leading lines in the rock formations and the glacier itself.
- Cost Estimate: Hut fee (NZD$45). Transport to Mount Cook Village (petrol/bus).
Essential Gear & Preparation for Your Secret Sunrise Mission
Chasing these hidden sunrises isn't just about showing up; it's about being prepared. These aren't your average tourist viewpoints.
Photography Gear:
- Sturdy Tripod: Non-negotiable for sharp, low-light shots and long exposures.
- Remote Shutter Release: Minimizes camera shake for crisp images.
- Wide-Angle Lens (16-35mm equivalent): For capturing the vastness of the landscape.
- Telephoto Lens (70-200mm equivalent): For isolating distant peaks, details, and creating compressed compositions.
- Filters: Graduated ND filters to balance bright skies with darker foregrounds.
- Extra Batteries: Cold weather drains batteries fast. Keep spares warm in an inside pocket.
- Headlamp/Flashlight: Essential for hiking in the dark.
- Lens Cloths & Blower: For keeping your gear clean from dust, mist, or condensation.
Hiking & Safety Essentials:
- Layers of Clothing: Mountain weather is unpredictable. Synthetics/wool are best. Think base layer, mid-layer fleece, and a waterproof/windproof outer shell.
- Sturdy Hiking Boots: With good ankle support and grip.
- Navigation: Download offline maps (Maps.me, AllTrails, Gaia GPS) and consider a physical map and compass as a backup.
- First-Aid Kit: Blister plasters, pain relievers, antiseptic wipes, emergency blanket.
- Plenty of Water & Snacks: High-energy foods are key.
- Sun Protection: Even at dawn, the sun's rays can be intense at altitude. Hat, sunglasses, sunscreen.
- Tell Someone Your Plan: Always inform a trusted person of your itinerary, including your expected return time.
- Check Weather Forecasts: Crucial for safety and photo opportunities.
Mastering the Shot: Photography Tips for Epic Sunrises
Once you're there, shivering slightly, camera in hand, how do you capture the magic?
- Arrive Early (and I mean EARLY): Aim to be at your spot at least an hour before official sunrise. This gives you time to scout compositions, set up your gear, and capture the incredible "blue hour" light.
- Scout Your Composition: Use the pre-dawn darkness to find interesting foreground elements (rocks, trees, snowdrifts), leading lines, and strong focal points. Don't just point and shoot; think about the story you want to tell.
- Shoot in RAW: This gives you maximum flexibility for post-processing, allowing you to recover details in highlights and shadows.
- Bracket Your Exposures: Sunrise scenes often have extreme dynamic range. Take multiple shots at different exposures (-2, 0, +2 EV) and blend them later in software like Lightroom or Photoshop for a perfectly exposed image.
- Focus Manually to Infinity: In low light, autofocus can struggle. Set your focus manually to infinity or use live view to zoom in and focus on a distant bright object.
- Experiment with White Balance: Auto white balance is okay, but try "Cloudy" or "Shade" settings to enhance the warm tones of the sunrise, or manually adjust for a cooler, ethereal blue hour.
- Patience is Key: The light changes dramatically and rapidly. Don't pack up immediately after the sun crests. The "golden hour" after sunrise can be just as beautiful, offering softer, warmer light.
- Look Behind You: Often, the light hitting the peaks behind you can be just as stunning as the direct sunrise.
- Capture the Feeling: Don't just aim for a technically perfect shot. Try to convey the emotion, the scale, the solitude. A tiny human figure (you or a hiking partner) can add a sense of scale and adventure.
Go Forth and Chase the Light!
There’s an undeniable allure to chasing the sunrise from a mountain peak. It's a pilgrimage, a test of endurance, and an unparalleled reward. When you're standing on that summit, the world unfolding beneath you in a symphony of light and color, you realize that the most precious moments aren't found on the most crowded feeds, but in the most remote corners of our incredible planet.
These five peaks are just a starting point. The world is full of undiscovered sunrises waiting for you. So, pack your bags, lace up your boots, and set your alarm. Seek out the silence, embrace the challenge, and capture those truly authentic, breathtaking moments that tell a story far richer than any trending reel.
Have you discovered a secret sunrise spot that blew your mind? Share your adventures in the comments below! Let's inspire each other to explore beyond the obvious. And don't forget to tag #TripsoraSecrets and #SunriseChaser on your next epic sunrise shot – we'd love to feature your authentic adventures!
---