Chasing the Golden Glow: My Obsession with Mountain Sunrise Photography
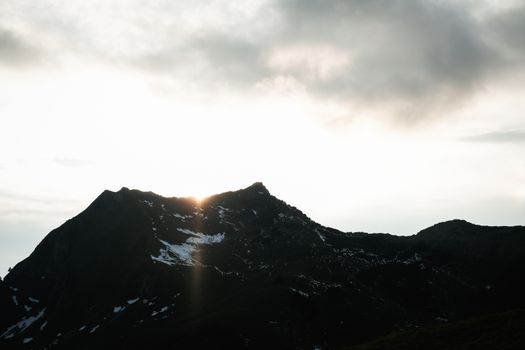
The alarm blares at 2:00 AM. It’s cold, dark, and every fibre of my being screams for just five more minutes of sleep. But I know what awaits: the promise of a sunrise so spectacular, it will etch itself into my memory and, hopefully, my camera's sensor forever. This isn't just about a pretty picture; it's about the pilgrimage, the pre-dawn trek under a canopy of stars, the anticipation building with every step, and that breathtaking moment when the first sliver of light kisses a jagged peak. It’s an addiction, a passion, and an absolute non-negotiable whenever I hit the mountains.
My first truly "mind-blowing" mountain sunrise was years ago, a spontaneous decision to hike up a local peak in the Scottish Highlands. I arrived at the summit utterly unprepared – no tripod, a phone camera, and a jacket far too thin for the biting wind. Yet, as the sun painted the sky in hues of fiery orange and soft lavender, silhouetting the ancient mountains, I was utterly captivated. The photos were terrible, blurry, and blown out, but the feeling? That was pure gold. It was then I realized: this wasn’t just a view; it was an experience, and I wanted to learn how to do it justice. Since then, I’ve dedicated countless early mornings, endured freezing temperatures, and hiked miles in the dark, all for that fleeting, glorious moment. And trust me, it’s always, always worth it.
So, if you're ready to trade a few hours of sleep for a lifetime of incredible memories and jaw-dropping photos, you’ve come to the right place. Let's dive into the world of mountain sunrise photography!
The Irresistible Allure: Why Mountain Sunrises Are Pure Magic
Why do we put ourselves through it? Why the early starts, the cold, the effort? Because mountain sunrises offer an experience unlike any other.
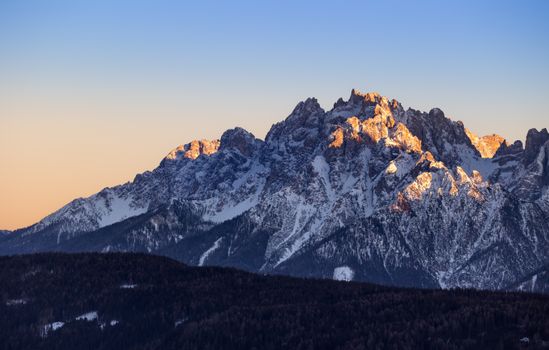
First, there's the light. The "golden hour" just after sunrise (and before sunset) is legendary among photographers for a reason. The sun, low on the horizon, casts a soft, warm, diffused glow that brings out incredible textures and colours in the landscape. Shadows are long and dramatic, adding depth and dimension. On a mountain, this effect is amplified, as the light slowly creeps down the peaks, revealing details layer by layer. The ethereal "alpenglow" – that brief moment when mountain peaks are bathed in a warm, rosy light – is a sight that will literally take your breath away.
Then, there's the solitude. While popular spots might draw a crowd, there's often a profound peace in those pre-dawn hours. You feel connected to nature in a raw, intimate way, witnessing the world awaken before the daily hustle begins. It's a chance for introspection, a moment to simply be in the presence of immense beauty.
Finally, there’s the challenge and reward. Reaching a mountain peak before dawn requires planning, effort, and sometimes a bit of grit. But the payoff? A sense of accomplishment, an unparalleled view, and the unique opportunity to capture images that few others will ever see. These photos aren't just snapshots; they're trophies of your adventure, telling a story of dedication and awe.
Gear Up for Glory: Your Essential Sunrise Photography Kit
Before you even think about which peak to conquer, you need to ensure you have the right tools. Hiking in the dark with expensive camera gear requires careful consideration.
1. The Camera Body:
- DSLR or Mirrorless: A full-frame camera will generally perform better in low light with less noise, but modern APS-C cameras are incredibly capable. Focus on one with good dynamic range.
- My Pick: I personally shoot with a Sony a7III. Its low-light performance is stellar, and it's robust enough for mountain adventures.
2. Lenses:
- Wide-Angle (14-24mm, 16-35mm): Essential for capturing the expansive mountain vistas and dramatic skies. A fast aperture (f/2.8) is a bonus for starry pre-dawn shots.
- Mid-Range Zoom (24-70mm): Versatile for capturing specific elements or slightly tighter compositions.
- Telephoto (70-200mm): Great for compressing distant peaks, isolating features, or capturing the sun as a large, dramatic orb.
- My Pick: I usually carry a 16-35mm f/2.8 and a 70-200mm f/4. This covers most scenarios without overloading my pack.
3. The Unsung Hero: A Sturdy Tripod:
- Crucial for Low Light: You'll be shooting long exposures in the dark and at dawn. A stable tripod is non-negotiable to avoid blurry shots.
- Material: Carbon fiber is lighter than aluminum, a big plus for hiking.
- My Pick: Manfrotto Befree Advanced Carbon Fiber. It's lightweight, compact, and surprisingly stable for its size.
4. Accessories:
- Remote Shutter Release: Prevents camera shake when pressing the shutter button. Wireless or wired.
- Extra Batteries: Cold weather drains batteries faster. Always carry at least two spares, preferably kept close to your body heat.
- Headlamp: Absolutely essential for hiking in the dark. Get one with a red light option to preserve night vision.
- Lens Cloths/Blower: For dew, dust, or smudges.
- Power Bank: To charge your phone or other small electronics.
5. Personal Gear (Safety First!):
- Layers: Mountains are unpredictable. Base layer, mid-layer (fleece), outer shell (waterproof/windproof).
- Sturdy Hiking Boots: With good ankle support.
- Navigation: Map, compass, and a fully charged GPS device/phone with offline maps.
- First-Aid Kit: Always.
- Water & Snacks: Hydration and energy are key.
- Small Backpack: To comfortably carry everything.
- Gloves & Hat: Even in summer, mountain mornings can be freezing.
Personal Anecdote: I once forgot my headlamp on a pre-dawn hike in the Julian Alps. My phone's flashlight died halfway up, leaving me stumbling in the dark for a good 20 minutes before a kind hiker with a spare offered assistance. Never again! Always double-check your headlamp, and have backup batteries.
Mastering the Light: Photography Tips for Epic Sunrise Shots
Having the gear is one thing; knowing how to use it is another. Here are my top tips for nailing those mind-blowing mountain sunrise photos:
1. Plan, Plan, Plan:
- Scout Your Location: If possible, visit your chosen spot during the day to identify good compositions, foreground interest, and potential hazards.
- Check Sunrise Times: Use apps like PhotoPills or The Photographer's Ephemeris to know exactly when and where the sun will rise. This also helps plan your arrival time.
- Weather Forecast: Crucial. Clear skies are great, but some clouds can add dramatic texture and colour. Too much cloud, and you might miss the show. Prioritize safety over a photo.
- Composition: Think about leading lines (trails, ridges), foreground interest (rocks, flowers, a small hut), and the rule of thirds. Look for opportunities to frame the sunrise.
2. Arrive Early (Really Early!):
- Aim to be at your shooting location at least an hour before actual sunrise. This gives you time to set up your gear, compose your shots, and capture the "blue hour" – a beautiful, soft light that precedes dawn.
- My Tip: Don't pack up immediately after sunrise! The light often remains incredible for 30-60 minutes after the sun is fully up, offering different moods and opportunities.
3. Camera Settings (Manual Mode is Your Friend):
- Aperture (f/8 - f/16): For landscapes, you generally want a deep depth of field to keep everything from foreground to background sharp. Start at f/11 and adjust.
- ISO (100-400): Keep your ISO as low as possible to minimize noise, especially in low light. Only increase if absolutely necessary.
- Shutter Speed: This will vary greatly depending on the light. In the blue hour, you might be shooting for 10-30 seconds. As the sun rises, it will become much faster (1/100th sec or more). Use your camera’s meter, but don’t be afraid to experiment.
- White Balance: Set to "Daylight" or "Cloudy" to capture the warm tones accurately, or shoot in RAW and adjust later.
- Shoot in RAW: Always. This gives you the most flexibility for post-processing and recovering details in shadows and highlights.
- Bracketing: When dealing with high dynamic range (bright sky, dark foreground), shoot multiple exposures (e.g., -2, 0, +2 EV) and blend them in post-processing to get detail across the entire scene. Many cameras have an auto-bracketing function.
4. Focus, Focus, Focus:
- Manual Focus: In low light, autofocus can struggle. Switch to manual focus.
- Hyperfocal Distance: A bit advanced, but understanding hyperfocal distance will ensure maximum sharpness from near to far. Alternatively, focus about one-third into your scene.
- Live View Zoom: Use your camera's live view and zoom in on a distant bright object (like a star or distant light) to achieve critical focus.
5. Composition is Key:
- Foreground Interest: Don't just point at the sky. Include interesting rocks, trees, or a path in the foreground to add depth and scale.
- Leading Lines: Use natural elements to draw the viewer's eye towards the main subject (the sunrise).
- Silhouettes: As the sun rises, capture dramatic silhouettes of peaks, trees, or even fellow hikers against the vibrant sky.
- Reflections: If there's a lake or a puddle, use it! Reflections can double the beauty of your shot.
Personal Anecdote: I once spent 30 minutes meticulously composing a shot of the sunrise over a jagged ridge, only to realize later that my tripod had slowly sunk into soft ground, resulting in a slightly blurred image. Always check your tripod's stability, especially on uneven terrain!
My Top 4 Mind-Blowing Mountain Peaks for Sunrise Photography
Alright, enough theory! Let's talk about the real stars of the show – the mountains themselves. These are some of my absolute favourite spots that have consistently delivered jaw-dropping sunrises and unforgettable photographic opportunities.
1. Mount Bromo, East Java, Indonesia: The Volcanic Spectacle
Mount Bromo isn't just a mountain; it's a dramatic volcanic complex that offers one of the most otherworldly sunrise experiences on Earth. Rising from the vast "Sea of Sand" within the Tengger caldera, Bromo's active crater steams gently as the sun paints the sky over a landscape that feels like another planet.
- The Experience: You'll typically start your journey in the dead of night from Cemoro Lawang. Most tourists opt for a jeep tour, which takes you to one of the viewpoints on Mount Penanjakan or King Kong Hill. These spots can get crowded, but the sheer scale of the panorama makes it manageable. As dawn breaks, the sky erupts in colour, slowly revealing the peaks of Bromo, Batok, and the distant Mahameru volcano, all shrouded in a mystical fog. The light catching the volcanic plumes is simply magical.
- Photography Tips: Bring a wide-angle lens for the epic panorama. A telephoto can be great for isolating Bromo's crater or the steam plumes. Be prepared for crowds and jostling for position at the main viewpoints. Consider finding a slightly less popular spot if you're willing to walk a bit further from the jeep drop-offs.
- Getting There: Fly into Surabaya (SUB), then take a bus or arrange a private transfer to Cemoro Lawang. Many tours include transport from Bali or other major cities.
- Cost (Approximate): Entrance fee to Bromo Tengger Semeru National Park is around IDR 220,000 (weekdays) or IDR 320,000 (weekends) for foreigners. A jeep tour typically costs IDR 500,000-700,000 per jeep (can be shared by 4-6 people).
- My Story: I remember the overwhelming scent of sulfur mixed with the damp morning air, the roar of the jeeps, and then the collective gasp from the crowd as the first rays hit. It felt like watching a painting come to life, each peak emerging from the darkness like a character in a grand drama.
2. The Dolomites, Italy: Alpine Grandeur at Dawn
The Italian Dolomites are a UNESCO World Heritage site, famous for their unique, jagged limestone peaks that glow with an ethereal alpenglow at sunrise. This region offers countless opportunities for breathtaking shots, but Seceda and Tre Cime di Lavaredo are two of my personal favourites.
- The Experience:
- Seceda: Accessible via cable car from Ortisei. To catch sunrise, you'd typically need to stay overnight in a nearby rifugio (mountain hut) like Rifugio Firenze or Rifugio Seceda, or embark on a very early morning hike from Ortisei (which is a significant climb). The iconic saw-tooth ridge of Seceda, with the Odle peaks in the background, is simply unparalleled as the first light hits.
- Tre Cime di Lavaredo: A classic. You can drive to Rifugio Auronzo (toll road) and then hike around the iconic three peaks. To get a true sunrise shot, staying in Rifugio Lavaredo or Rifugio Locatelli (about an hour's hike from Auronzo) is ideal. The view of the Tre Cime from the north face, bathed in alpenglow, is a quintessential Dolomites shot.
- Photography Tips: Wide-angle lenses are a must here to capture the scale. Look for foreground elements like wildflowers, small huts, or rocky outcrops to add depth. The light changes quickly, so be ready to shoot continuously.
- Getting There: Fly into Venice (VCE) or Innsbruck (INN), then rent a car. A car is highly recommended for exploring the Dolomites.
- Cost (Approximate): Cable car tickets for Seceda are around €35-40 return. Staying in a rifugio can range from €40-80 per night (dormitory) to €100+ (private room) including half-board. The Tre Cime toll road is around €30 per car.
- My Story: Waking up in Rifugio Locatelli, stepping out into the crisp, pre-dawn air, and watching the Tre Cime slowly ignite with that incredible orange-pink glow was like a dream. The silence, broken only by the occasional cowbell, was profound. It's a place that truly makes you feel small in the best possible way.
3. Mount Fuji, Japan: The Iconic Silhouette
Mount Fuji, Japan's highest peak, is a symbol of beauty and reverence. While climbing Fuji for sunrise is an option, capturing its iconic, symmetrical cone from a distance, especially with reflections or cultural elements, makes for an unforgettable sunrise photograph.
- The Experience:
- Chureito Pagoda: Perhaps the most famous and Instagrammable spot. You'll need to climb about 400 steps to reach the pagoda, which perfectly frames Fuji, especially in cherry blossom season (late April) or autumn (late October/early November). Arrive well before dawn to secure a good spot.
- Lake Kawaguchiko: Offers numerous viewpoints, particularly along its northern shore, where Fuji reflects perfectly in the calm water. The "upside-down Fuji" is a classic shot. There are also several parks and observation decks.
- Photography Tips: A wide-angle lens is great for the Pagoda view to include all elements. For Lake Kawaguchiko, both wide-angle for reflections and a telephoto for compressing the mountain are useful. Pay attention to the weather; Fuji is often shy and can be shrouded in clouds.
- Getting There: Take a direct bus from Shinjuku Expressway Bus Terminal in Tokyo to Kawaguchiko Station (approx. 2 hours). From there, local buses or taxis can take you to specific viewpoints.
- Cost (Approximate): Bus from Tokyo is around ¥2,000-2,500 one way. No specific entrance fees for these viewpoints, but transport costs apply.
- My Story: I arrived at Chureito Pagoda in the dark, the climb surprisingly steep with all my gear. As the sky began to lighten, revealing the pagoda and then the majestic, snow-capped Fuji behind it, a hush fell over the small crowd. It was almost spiritual, a testament to Fuji's powerful presence. The light was perfect, the air still, and the shot felt like a piece of living art.
4. Patagonia (Fitz Roy/Torres del Paine), Argentina/Chile: The Rugged Epic
For the truly adventurous, Patagonia offers some of the most dramatic and challenging mountain sunrises. The jagged granite spires of Fitz Roy in Argentina and the iconic Torres del Paine in Chile are bucket-list destinations for landscape photographers.
- The Experience:
- Fitz Roy (Argentina): The classic sunrise shot is from Laguna de los Tres. This requires a significant hike, often involving camping overnight at Poincenot or Rio Blanco campsites (free, but permits may be required). Waking up before dawn for the final steep ascent to the lake is arduous, but witnessing the Fitz Roy massif erupt in alpenglow is an unparalleled reward.
- Torres del Paine (Chile): The "Towers" themselves, viewed from the base of the Mirador Las Torres, are the prize. This is typically the culmination of the W Trek or a challenging day hike. Camping at Campamento Chileno or Torres is essential for a pre-dawn start to reach the viewpoint.
- Photography Tips: This is demanding terrain. Prioritize sturdy gear, lightweight but effective. Wide-angle is key for the vast landscapes, but a mid-range zoom can isolate the granite spires. Be prepared for strong winds and rapidly changing weather. Protection for your camera from rain/dust is crucial.
- Getting There:
- Fitz Roy: Fly into El Calafate (FTE), Argentina, then take a bus to El Chaltén (approx. 3 hours).
- Torres del Paine: Fly into Punta Arenas (PUQ) or Puerto Natales (PNT), Chile. Buses run from Puerto Natales to the park entrance.
- Cost (Approximate): Torres del Paine National Park entrance fee is around USD $35 for foreigners. Camping fees vary but can be USD $10-25 per night. Transport to trailheads.
- My Story: The hike to Laguna de los Tres for Fitz Roy sunrise was one of the toughest I've ever done. My legs were screaming, and the wind was relentless. But then, as the first light hit the granite, turning it fiery red and orange against a deep blue sky, I forgot every ache. It was raw, powerful, and made me feel utterly alive. Every single photo from that morning is a reminder of human resilience and nature's incredible power.
Beyond the Lens: Embrace the Moment
While the goal is to capture stunning photographs, remember that the experience itself is just as, if not more, valuable. There will be times when the clouds roll in, the light isn't perfect, or your shot simply doesn't turn out as planned. And that's okay.
- Put the Camera Down: For a few minutes, just stand there. Breathe in the crisp mountain air. Listen to the silence. Watch the colours unfold with your own eyes, not just through a viewfinder.
- Connect with Nature: The mountains teach humility and patience. Embrace the journey, the effort, and the sheer beauty of the natural world.
- Share the Experience: If you're with others, share a moment of quiet awe. If you're alone, let the solitude wash over you.
These moments are what truly blow your mind, long after the photos have been edited and shared. They're the memories that will stay with you, inspiring your next adventure.
Ready to Chase the Light?
Chasing mountain sunrises is more than just a photography pursuit; it's an adventure for the soul. It challenges you, rewards you, and connects you to the raw, untamed beauty of our planet. From the volcanic drama of Bromo to the majestic spires of Patagonia, each peak offers a unique canvas for nature's greatest show.
So, pack your bags, charge your batteries, and set that early alarm. Which mind-blowing mountain peak will you conquer for your next unforgettable sunrise shot?
Share your favourite mountain sunrise spots and photography tips in the comments below! And don't forget to tag #TripsoraSunrise on Instagram with your epic captures!
---