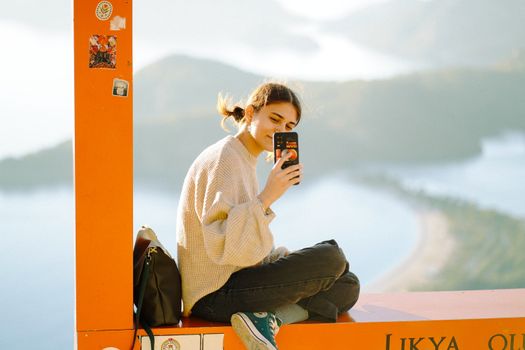
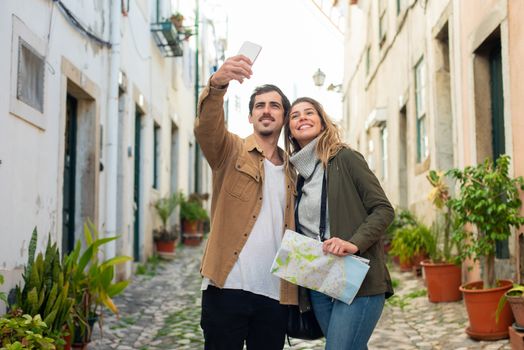
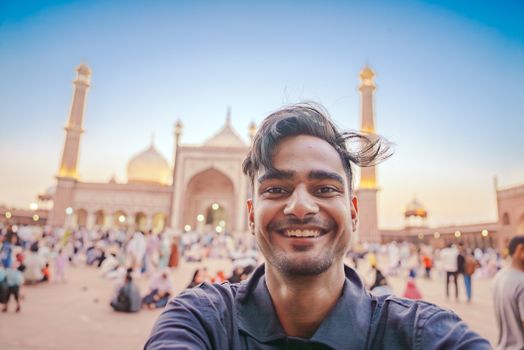
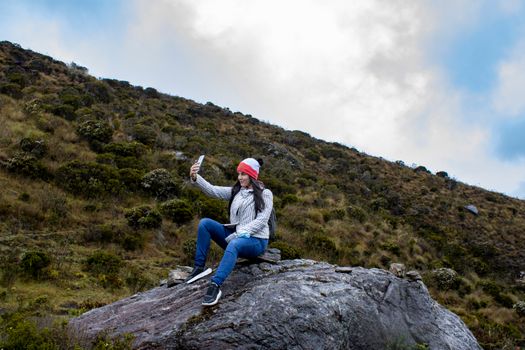
Let's be real for a second. We all scroll through Instagram, double-tapping those impossibly perfect travel photos, secretly wishing our own vacation snaps looked half as good. You know the ones: the person perfectly framed against a breathtaking sunset, a dynamic cityscape, or a whimsical art installation. And then you try it. You angle, you zoom, you retake twenty times, and still, it just… doesn’t quite hit the mark. Sigh.
I’ve been there. More times than I care to admit. My camera roll is a graveyard of blurry attempts, awkward poses, and perfectly beautiful landscapes marred by my own poor framing. For years, I envied those travel influencers who seemed to have an innate talent for capturing magic. My turning point came during a rather embarrassing attempt to photograph a particularly vibrant mural in Lisbon. After a good ten minutes of fiddling with my phone, a local walked by, chuckled, and simply said, "Just stand in front. It does the work for you." He was right. I took a quick, unthinking snap, and for the first time, I actually loved my photo.
That simple moment sparked a revelation: not every incredible travel photo requires a professional photographer, fancy gear, or even a basic understanding of the 'rule of thirds.' Some places are so inherently stunning, so perfectly designed for a visual impact, that all you need to do is show up, point your phone, and press the shutter button. The backdrop does all the heavy lifting.
And guess what? These "zero photo skill" spots are trending hard right now. Travelers are seeking out locations that offer instant gratification for their social feeds, places where epic shots are practically guaranteed. So, if you're ready to elevate your Instagram game without enrolling in a photography course, grab your phone, clean that lens, and get ready to bookmark these incredible destinations.
1. Cappadocia, Turkey: Balloon Bonanza Backdrops
Imagine waking up before dawn, the air crisp, and as the sun peeks over the horizon, hundreds of colorful hot air balloons begin to ascend into the sky, dotting the whimsical fairy chimneys of Cappadocia. It's not just a sight; it's a feeling, and it’s arguably one of the most visually spectacular places on Earth.
Why it’s zero-skill easy: The sheer scale and number of balloons create an undeniable "wow" factor. Whether you’re standing on a viewpoint, watching from your hotel terrace, or even inside a balloon yourself, the scene is so grand and vibrant that it’s almost impossible to take a bad photo. The warm glow of the sunrise on the ancient rock formations combined with the floating armada of balloons makes every angle a winner. Just point your phone, make sure you get some balloons in the frame (which is hard not to do), and snap. The colors, the movement, the unique landscape – it all conspires to make you look like a pro.
My personal take: My first morning in Goreme, I was still half-asleep, shivering in my jacket, but the moment those first balloons lifted, I forgot everything. I literally just held my phone up, took a panoramic shot, and it instantly became one of my most liked photos ever. No filters, no edits. It was purely the magic of Cappadocia.
Practical Tips for Your Shot:
- Best Time: Sunrise (around 5:00-7:00 AM, depending on the season). This is when the balloons launch, and the light is soft and golden.
- Prime Viewpoints: Love Valley, Rose Valley, or even the terraces of many cave hotels in Goreme offer incredible vantage points. Ask your hotel for their best recommendation.
- What to Wear: Dress in layers! It's cold before sunrise but warms up. A pop of color in your outfit can really stand out against the earthy tones and colorful balloons.
- Cost: Watching from the ground is free! A hot air balloon ride typically costs €150-€300, but it's an unforgettable experience and offers a different perspective for photos.
2. Salar de Uyuni, Bolivia: The World's Largest Mirror
Stepping onto the Salar de Uyuni in Bolivia during the wet season is like entering another dimension. The world's largest salt flat transforms into an enormous, shallow lake, reflecting the sky so perfectly that the horizon disappears. You literally can't tell where the sky ends and the ground begins.
Why it’s zero-skill easy: This place is a natural optical illusion. The mirror effect is so powerful that it does all the work for you. Standing in the middle, with the vast expanse of sky above and below, creates incredibly surreal and artistic photos with minimal effort. Even a simple, centered shot of you standing there will look like a masterpiece. The reflection creates automatic symmetry and depth that's hard to achieve elsewhere.
My personal take: I remember our guide telling us, "Just stand still, look at the camera, and smile. The Salar will do the rest." He wasn't kidding. We took photos of us "walking on clouds," "holding the sun," and even "swimming in the sky." Every single shot looked professionally composed, purely because the environment was so unique.
Practical Tips for Your Shot:
- Best Time: Wet season (December to April) for the iconic mirror effect. During the dry season, it’s a vast, white expanse, still stunning for perspective shots, but less "zero skill."
- Bring Props: Small toys (dinosaurs, action figures), empty bottles, or even just your hands can be used to create fun perspective shots. Your guide will often have ideas and even help you pose.
- Wide Angle: Use your phone's wide-angle setting or panorama mode to capture the immense scale.
- Cost: A multi-day tour from Uyuni or San Pedro de Atacama typically costs $150-$300 USD, covering transport, accommodation, and food.
3. Antelope Canyon, Arizona, USA: Slot Canyon Serenity
Deep within the Navajo Nation in Arizona lies Antelope Canyon, a mesmerizing slot canyon carved by water and wind. Its smooth, undulating sandstone walls glow with vibrant oranges, purples, and reds as sunlight filters down from above, creating ethereal beams of light.
Why it’s zero-skill easy: The beauty here is inherent in the environment itself. The swirling patterns of the rock, the rich colors, and the dramatic light beams are so captivating that any photo taken within the canyon looks otherworldly. You don't need to worry about composition; just point your camera at the glowing walls or towards a light beam, and you'll capture something stunning. The guides are also experts at pointing out the best angles and even adjusting your phone settings for optimal results!
My personal take: The moment I stepped into Upper Antelope Canyon, I felt like I was inside a living painting. The light shifted constantly, revealing new hues. Our Navajo guide, bless his heart, practically took my phone from me and showed me exactly where to stand and when to shoot to get those iconic light beams. He even showed us how to make the walls look like a roaring lion or a flowing waterfall. It was photography on autopilot!
Practical Tips for Your Shot:
- Book a Tour: Access is only via guided tours with Navajo operators. Book well in advance, especially for prime midday slots (when the light beams are strongest).
- Upper vs. Lower: Upper Antelope Canyon is famous for light beams, while Lower is known for its narrow, winding passages. Both are incredible.
- Timing: Midday (11 AM - 1 PM) is often best for seeing the famous light beams in Upper Antelope Canyon, but any time of day offers incredible colors.
- Clean Lens: Dust can be an issue in the canyon, so keep your lens sparkling clean.
- Cost: Tours typically range from $60-$120 USD per person, plus a Navajo Parks & Recreation permit fee.
4. Wynwood Walls, Miami, USA: Art That Poses For You
In the heart of Miami's Wynwood Arts District, the Wynwood Walls are an outdoor street art museum featuring massive, vibrant murals by world-renowned artists. Every wall is a canvas, bursting with color, intricate details, and powerful messages.
Why it’s zero-skill easy: This entire area is designed for visual impact. Each mural is a readymade, stunning backdrop. You literally just need to stand in front of your favorite piece, smile (or pose dramatically, whatever your vibe), and snap. The art does all the storytelling and provides the perfect frame. The ever-changing nature of the murals also means there's always something new to discover and photograph.
My personal take: I spent an entire afternoon wandering through Wynwood, feeling like I was in an outdoor gallery. Every corner I turned presented a new, jaw-dropping mural. I didn't have to think about composition; I just picked a wall that spoke to me, stood in front of it, and let the art do the talking. My outfit, a simple white t-shirt, popped perfectly against the explosion of colors. It was the easiest photo session of my life!
Practical Tips for Your Shot:
- Go Early: To avoid crowds and get clear shots, visit right when they open or on a weekday morning.
- Explore Beyond the Walls: While the main Wynwood Walls area is fantastic, the surrounding streets are also filled with incredible street art. Wander and discover!
- Wear Contrasting Colors: Let the murals be the star, but choose an outfit that pops against the background (e.g., white against a colorful mural, or a vibrant color against a more monochromatic piece).
- Cost: The main Wynwood Walls area is ticketed (around $12-$15 USD), but much of the surrounding street art is free to view.
5. Gardens by the Bay, Singapore: Sci-Fi Supertrees & Floral Fantasies
Singapore's Gardens by the Bay is a futuristic botanical wonderland. Dominated by the iconic Supertree Grove – towering, tree-like structures covered in plants that light up at night – and home to stunning conservatories like the Cloud Forest and Flower Dome, it's a feast for the eyes.
Why it’s zero-skill easy: The Supertree Grove, especially during the Garden Rhapsody light and sound show, is an immediate showstopper. The sheer scale and futuristic design are so unique that any photo taken here looks straight out of a sci-fi movie. Inside the conservatories, the lush, meticulously designed landscapes and dramatic waterfalls provide endless, beautiful backdrops that require zero effort to capture. The lighting is often controlled, making it even easier.
My personal take: Walking through the Supertree Grove at dusk, waiting for the light show, felt like I’d stepped onto Pandora. The lights twinkling against the deepening sky were mesmerizing. I just held my phone up, took a few wide shots, and my friends back home thought I’d used a professional camera. The Cloud Forest, with its massive indoor waterfall, was equally impressive; the mist and greenery created such a serene, dramatic backdrop that my selfies practically took themselves.
Practical Tips for Your Shot:
- Best Time: Visit the Supertree Grove at dusk to experience both daylight and the magical Garden Rhapsody light show (typically 7:45 PM and 8:45 PM daily).
- Use Wide-Angle: Your phone's wide-angle lens will be your best friend here to capture the grandeur of the Supertrees and the conservatories.
- Explore All Levels: Don't just stay on the ground. The OCBC Skyway (ticketed) offers elevated views of the Supertrees.
- Cost: Entry to the outdoor gardens and Supertree Grove is free. Conservatories (Cloud Forest, Flower Dome) tickets are around S$28-S$53 for tourists.
6. Experiential Museums: Playgrounds for Your Camera
Think Museum of Ice Cream, Color Factory, Trick Eye Museum, or the immersive Van Gogh experiences. These pop-up and permanent installations are designed with one primary goal: to be incredibly fun and incredibly photogenic.
Why it’s zero-skill easy: These museums are literally built for photos. Every room, every installation, every prop is carefully curated to be a vibrant, quirky, and interactive backdrop. The lighting is often optimized, and the themes are so playful that simply being in the space encourages fun poses. You don't need to worry about finding the right light or angle; they've already done that for you. Just jump into a sprinkle pool, stand in front of a neon sign, or interact with an optical illusion.
My personal take: My visit to the Museum of Ice Cream in New York was pure photographic joy. I'm usually self-conscious, but surrounded by giant gummy bears and a pool of sprinkles, I couldn't help but let loose. Every corner was a photo op, and I left with a camera roll full of bright, happy, and genuinely shareable photos that required zero thought about composition. It was like a giant, interactive selfie studio.
Practical Tips for Your Shot:
- Book in Advance: These spots are popular and often sell out quickly.
- Embrace the Theme: Don't be shy! Interact with the installations, use the props, and have fun with the playful themes.
- Wear Solid Colors: Let the vibrant backdrops shine. Solid, contrasting colors in your outfit will help you stand out.
- Cost: Tickets vary widely but are typically in the $30-$50 USD range per person.
7. Iconic Cityscapes from the Perfect Angle: Postcard Perfect, Effortless You
Sometimes, the simplest, most classic shots are the most effective. Every major city has that one iconic viewpoint where the skyline or landmark just looks perfect. Think the Eiffel Tower from Trocadero, the Brooklyn Bridge from Dumbo, or the Sydney Opera House from the Royal Botanic Garden.
Why it’s zero-skill easy: These viewpoints are famous for a reason: they offer an unobstructed, perfectly framed view of an iconic landmark. You don't need to scout locations or worry about power lines getting in the way. Just stand at the designated spot, and the city does the rest. The landmark is instantly recognizable, providing a powerful sense of place and an impressive backdrop without you needing to do anything but smile.
My personal take: Standing on the steps of Trocadero at sunset, watching the Eiffel Tower sparkle, I realized why this spot is so legendary. Thousands of people were there, all taking photos, and every single one looked incredible. The Eiffel Tower is just there, grand and majestic, begging to be in your photo. I simply held my phone up, framed the tower behind me, and got the quintessential Paris shot without a second thought. It's the ultimate "I was here!" photo.
Practical Tips for Your Shot:
- Research the "Classic Spot": Before you go, a quick Google search like "best photo spot Eiffel Tower" will reveal the common, easy-to-find locations.
- Go at Golden Hour: Sunrise or sunset often provides the most flattering light for cityscapes.
- Use People as Scale: Including a few people (even if they're not you) can help convey the immense scale of the landmark.
- Cost: Usually free to access these public viewpoints.
Your Journey to Effortless Insta-Fame Starts Now!
The world is brimming with incredible places that are practically begging to be photographed, no advanced skills required. These trending spots prove that you don't need to be a photography guru to capture truly stunning travel memories and share them with the world. The key is to find locations where the sheer beauty, scale, or artistic design of the environment does all the creative heavy lifting for you.
So, next time you're planning a trip, consider adding one of these zero-skill selfie spots to your itinerary. Embrace the ease, revel in the beauty, and let the magic of these destinations transform your travel feed from 'meh' to magnificent.
Now, it's your turn! Which of these spots are you adding to your bucket list? Have you discovered another "zero photo skill" gem that deserves a shout-out? Share your experiences and tips in the comments below – let's inspire each other to capture more effortless travel magic!
---