The Secret Sauce of Stunning Indoor Shots: Unmasking the Lighting Tricks Influencers Don’t Want You to Know
There I was, standing in the opulent Hall of Mirrors at Versailles, my jaw practically on the polished floor. The light streaming through those grand windows was ethereal, bouncing off every gilded surface and crystal chandelier. I raised my phone, snapped a shot, and… ugh. The photo was dark, grainy, and utterly failed to capture the magic I was witnessing. It looked like I’d taken it in a cave, not one of the world's most magnificent palaces.
Sound familiar? We’ve all been there. You’re exploring a dimly lit ancient temple in Kyoto, sipping espresso in a cozy, atmospheric Parisian cafe, or marveling at the vibrant stalls of a Moroccan souk, and your camera just refuses to cooperate. Your indoor photos come out blurry, washed out, or so dark you can barely tell what you’re looking at. Meanwhile, your favorite travel influencers seem to effortlessly produce magazine-worthy shots from similar locations, making you wonder if they have some secret, magical camera.
Well, guess what? They do have a secret, but it’s not about expensive gear. It’s about understanding and manipulating light – the most powerful tool in any photographer’s arsenal. And today, my fellow travelers, I’m pulling back the curtain on these "influencer-only" lighting tricks. Forget paying for workshops or buying bulky equipment. With a little knowledge and a few clever hacks, you can transform your indoor travel photography from 'meh' to magnificent. Let's dive in!
1. The Golden Rule of Indoors: Befriend Natural Light (and Your Windows)
When it comes to indoor photography, natural light is your absolute best friend. Period. It's soft, flattering, and free. The trick is knowing how to find it and how to use it effectively.
I learned this lesson the hard way during a particularly gloomy winter trip to Amsterdam. My hotel room, though charming, was a bit dark. My first attempts at capturing my morning coffee setup were disastrous – muddy colors, harsh shadows. Then, I remembered a tip from a seasoned photographer friend: "Always seek the window." I dragged my little table right up to the window overlooking the canal, placed my coffee and stroopwafel, and voila! The soft, diffused light streaming in transformed the scene. It wasn't direct sunlight, but the ambient light from the overcast sky outside acted like a giant softbox, bathing my shot in a beautiful, even glow.
Actionable Tips for Harnessing Natural Light:
- Scout Your Location: Before you even think about taking a photo, look for the windows. Are they big? Small? Do they face north (soft, consistent light) or south (potentially harsh direct light)?
- Position Your Subject: Always try to position your subject (whether it's a person, a plate of food, or a charming detail) facing towards the window. This ensures even illumination and beautiful catchlights in eyes if shooting portraits.
- Use Windows as Diffusers: If the sunlight streaming through a window is too harsh, look for sheer curtains. These act as natural diffusers, softening the light and preventing harsh shadows and blown-out highlights. No curtains? A thin white scarf or even a piece of parchment paper held up can do the trick!
- Embrace the Indoor Golden Hour: Just like outdoors, the light filtering through windows during early morning or late afternoon can have a beautiful, warm, golden hue. This is perfect for cozy cafe shots or capturing the intimate ambiance of a boutique hotel.
2. Beyond the Flash: Mastering Existing Artificial Light Sources
Let's be real: sometimes, natural light just isn't an option. You're in a dimly lit bar in Barcelona, a subterranean art gallery in Berlin, or a grand, windowless museum hall. Your camera's built-in flash? Usually a recipe for disaster – harsh, flat, and unflattering. But don't despair! Existing artificial light sources can be your secret weapon.
I remember once trying to capture the intricate details of a medieval tapestry in a very dark section of the Cluny Museum in Paris. No windows, and flash was forbidden (rightly so!). I noticed a small, strategically placed spotlight illuminating a nearby sculpture. Instead of trying to light the tapestry directly, I used the spotlight to create a dramatic side-light effect on a section of the tapestry, highlighting its texture and depth. It wasn't a full shot, but a captivating detail that told a story.
Actionable Tips for Using Artificial Light:
- Look for Lamps and Fixtures: Most indoor spaces have lamps, chandeliers, or overhead lights. Don't just ignore them; use them!
- Side Lighting: Position your subject so a lamp is to their side. This creates interesting shadows and highlights, adding dimension.
- Backlighting (with caution): A lamp behind your subject can create a beautiful rim light effect, separating them from the background. Just be careful not to blow out the background completely.
- Bounce Your Phone Flash: If you must use a flash (and you only have your phone), don't aim it directly at your subject. Instead, try bouncing it off a nearby white wall or ceiling. This diffuses the light, making it softer and more flattering. It takes practice, but it's a game-changer.
- Carry a Mini LED Light: This is an influencer favorite! A small, portable LED light panel (like an Aputure MC or a Lume Cube) can fit in your pocket and provide a soft, adjustable light source for close-up shots of food, details, or even subtle fill light for portraits. They typically cost between $50-$100 and are worth every penny for serious phone photographers. I used my Lume Cube to perfectly illuminate a delicious Tagine in a dimly lit Marrakech riad, giving it that vibrant pop it deserved.
3. The Power of Reflection and Diffusion: Your Improvised Studio
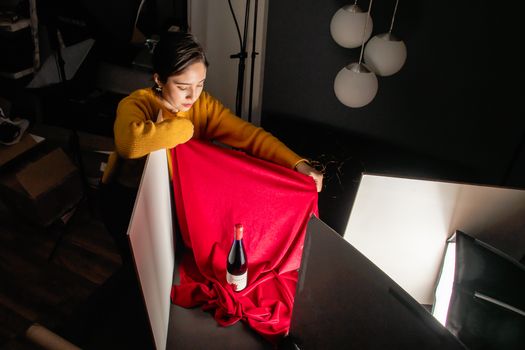
This is where the real "influencer magic" happens – making the most of what you have around you. Influencers are masters of improvisation, turning everyday objects into professional photography tools. You don't need a full studio kit; you just need to think creatively.
One of my favorite hacks came during a food photography session in a tiny, bustling trattoria in Rome. The lighting was challenging, but I desperately wanted a killer shot of my Cacio e Pepe. I noticed the white paper placemat. I asked my dining companion to hold it up opposite the window, angled slightly to reflect the window light back onto my pasta. The result? Instantly brighter, more evenly lit, and mouth-watering. My friend thought I was crazy, but the photo spoke for itself!
Actionable Tips for Reflection and Diffusion:
- The White Surface is Your Friend: Any white or light-colored surface can act as a reflector. Think white walls, ceilings, tablecloths, napkins, menus, or even a friend's white shirt! Use them to bounce light back onto your subject, filling in shadows and brightening the scene.
- DIY Diffusers: As mentioned, sheer curtains are fantastic. But if direct light is too harsh and there are no curtains, try holding a piece of parchment paper, a thin white scarf, or even a frosted plastic bag between the light source and your subject. This softens the light dramatically.
- Pack a Collapsible Reflector: For around $20-30 on Amazon, you can get a small (12-24 inch) 5-in-1 collapsible reflector. It folds down to nothing and often includes white, silver, gold, black, and translucent surfaces. This is a pro tool in a travel-friendly package, perfect for indoor portraits or product shots. I always have one tucked into my camera bag, ready to rescue a shot in a challenging hotel room.
4. Beyond Auto Mode: Camera Settings for Low Light Brilliance
While lighting hacks are crucial, understanding a few basic camera settings will elevate your game significantly, especially in low-light indoor environments. This applies whether you're shooting with a smartphone or a mirrorless camera. Influencers rarely shoot on auto mode when light is tricky; they take control.
I once spent an afternoon inside the Pantheon in Rome, utterly mesmerized by the oculus and the way the light moved through the ancient space. My initial photos were a blurry, noisy mess. I knew I needed to learn more than just pointing and shooting. After some research, I started experimenting with manual settings, increasing my ISO, widening my aperture, and stabilizing my phone. The difference was night and day. I captured the grandeur and the subtle play of light that I initially thought was impossible without professional gear.
Actionable Tips for Camera Settings:
- Increase ISO (Sensitivity): ISO controls your camera's sensitivity to light. In dark environments, you'll need to increase it. However, higher ISO can introduce "noise" (graininess). Learn your camera's sweet spot – for most modern smartphones, you can go up to 800-1600 ISO without too much noise. Dedicated cameras can often handle 3200-6400 or even higher.
- Widen Aperture (Lower f-number): Aperture controls how much light enters your lens and affects depth of field. A wider aperture (smaller f-number, e.g., f/1.8, f/2.8) lets in more light, which is ideal for low light. It also creates that beautiful blurred background (bokeh) that influencers love. Many modern phone cameras have excellent wide apertures.
- Slow Down Shutter Speed (Use Stabilization): Shutter speed determines how long your camera's sensor is exposed to light. In low light, a slower shutter speed lets in more light. However, it also makes your photos susceptible to blur from camera shake.
- Solution: Use a tripod (even a small tabletop one for your phone), lean against a steady surface, or brace your elbows against your body. Many phones and cameras also have image stabilization built-in.
- Manual Mode is Your Friend: If your phone camera app (like Halide, Moment, or the native iPhone/Android pro modes) or your dedicated camera allows, switch to manual or semi-manual modes (Aperture Priority or Shutter Priority). This gives you control over these settings.
5. The Post-Processing Polish: Where Good Becomes Great
Even with the best lighting techniques, post-processing is where your indoor shots truly shine. Influencers don't just snap and post; they meticulously edit their photos to enhance light, color, and mood. Think of it as the final, critical step in shaping your visual story.
I used to think editing was "cheating." Then I discovered the magic of Lightroom Mobile (free version is fantastic!) during a trip to Vietnam. I had a decent photo of a bustling market stall in Hanoi, but the colors felt a bit dull, and the shadows were too deep. A few tweaks to exposure, highlights, and shadows, plus a slight bump in saturation, and suddenly, the photo popped! The vibrant spices and fresh produce came alive, telling a much more compelling story.
Actionable Tips for Post-Processing:
- Adjust Exposure and Contrast: These are your go-to adjustments for brightening a dark photo and adding punch. Don't overdo it, or your photo will look artificial.
- Recover Highlights and Shadows: Often, indoor photos have either blown-out highlights (too bright) or crushed shadows (too dark). Use the "Highlights" and "Shadows" sliders to bring back detail in these areas.
- Correct White Balance: Indoor lighting can often cast an unwanted color tint (e.g., yellowish from incandescent bulbs, bluish from fluorescent). Use the "White Balance" tool (temperature and tint sliders) to neutralize these color casts and make whites look truly white.
- Selective Adjustments: Many editing apps (like Snapseed or Lightroom Mobile) allow for selective adjustments. This means you can brighten a specific dark corner of your photo or reduce glare on a particular object without affecting the entire image. This is a powerful tool for balancing uneven indoor lighting.
- Sharpening and Noise Reduction: A touch of sharpening can make details pop, especially in indoor shots. If your high ISO caused some graininess, a subtle amount of noise reduction can smooth it out (be careful not to overdo it, or your photo will look plasticky).
6. The Influencer Mindset: Beyond the Technicalities
Finally, let's talk about the "influencer mindset." It's not just about the technicalities of light; it's about how you see and use light to tell a story and create an emotional connection. This is the intangible trick they truly don't want you to know – because it's about developing your eye.
I once watched an influencer meticulously arrange a flat lay in a cafe in Lisbon. She didn't just place her coffee and pastry; she considered the angle of the window light, the texture of the wooden table, the placement of a small flower. She shot from multiple angles, always moving around the light, not just standing still. She was crafting a narrative, not just taking a photo.
Actionable Tips for the Influencer Mindset:
- Look for Light Patterns: Notice how light falls on different surfaces. Does it create interesting shadows? Does it highlight a particular architectural detail? Use these patterns to compose your shot.
- Use Light to Guide the Eye: Bright areas naturally draw the viewer's eye. Use this to your advantage by ensuring your main subject is well-lit.
- Embrace Mood: Sometimes, a dimly lit, moody shot is the story. Don't always chase brightness. If you're in a cozy, atmospheric bar, let the low light contribute to that feeling. Just ensure your subject is still discernible.
- Practice, Practice, Practice: The more you observe light and experiment with these tricks, the more intuitive it will become. Your eye will start to automatically seek out the best light, even in challenging indoor environments.
Your Indoor Shots Just Got an Upgrade!
There you have it, fellow travelers! The "secrets" to stunning indoor photography aren't so secret after all. They're about observation, improvisation, and a willingness to step beyond auto mode. From the grand halls of palaces to the intimate corners of cafes, you now have the tools to capture the true essence of your indoor travel experiences.
Stop letting bad lighting ruin your memories. Go out there, experiment with these techniques, and watch your indoor shots transform from dull to dazzling. You'll be creating viral-worthy content in no time, and perhaps even inspiring a few aspiring influencers along the way!
What's your favorite indoor location to photograph, and what lighting challenges have you faced? Share your stunning new shots with us using #TripsoraLightHacks and tag us! We can't wait to see your masterpieces.
---