Lighting Tricks for Stunning Indoor Shots You Need to Experience Before You Die
Remember that time I was in a dimly lit Parisian café, the air thick with the scent of fresh croissants and strong coffee, the chatter of locals a melodic hum? It was the epitome of a travel moment – cozy, authentic, utterly magical. I pulled out my phone, eager to capture the scene, the warm glow of the lamps, the intricate details of the vintage decor. But when I looked at the photo, my heart sank. It was a blurry, grainy mess. Dark, underexposed, and utterly failing to convey the vibrant, intimate atmosphere I was experiencing. For years, indoor shots were my Achilles' heel, my personal photographic Everest.
I'd scroll through Instagram, admiring photos of sun-drenched hotel rooms, perfectly lit museum exhibits, and atmospheric restaurant interiors, wondering how on earth these photographers managed to make them look so effortless. Was it an expensive camera? A professional lighting rig? I felt perpetually stuck in the "flash-makes-everything-look-terrible" dilemma.
But then, a revelation. A lightbulb moment, if you will! It wasn't my camera that was lacking; it was my understanding of light itself. And once I cracked that code, once I started seeing light rather than just pointing and shooting, my indoor travel photos went from "meh" to "marvelous." Seriously, it was a game-changer. My Instagram feed got a serious glow-up, and suddenly, those once-impossible indoor scenes became my favorite subjects.
Today, I'm pulling back the curtain and sharing the lighting tricks that literally changed my travel photography game – secrets so powerful you'll wonder how you ever lived without them. These aren't complicated, gear-heavy techniques. These are practical, actionable tips you can use with just your smartphone or a basic camera, turning mundane indoor spaces into luminous, shareable masterpieces. Get ready to experience the world through a new, brighter lens!
The Language of Light: Understanding Your Best Friend (or Foe)
Before we dive into the "how-to," let's spend a moment understanding what light is and how it behaves. Think of light as the paint and your camera as the canvas. If you understand your paint, you can create masterpieces.
1. Quality of Light: Hard vs. Soft
- Hard Light: Creates sharp, distinct shadows and bright highlights. Think direct midday sun. Indoors, this can come from an unshaded window or a direct, undiffused lamp. It can be dramatic but also unforgiving, emphasizing textures and imperfections.
- Soft Light: Creates gradual transitions from light to shadow, with gentle, diffused highlights. Think an overcast day or light filtered through curtains. Indoors, this is often your best friend for flattering portraits and capturing a gentle ambiance.
2. Direction of Light: Where It Comes From
- Front Light: Light hitting your subject directly from the front (behind the camera). Flattens subjects, reduces shadows. Great for even exposure but can lack depth.
- Side Light: Light hitting your subject from the side. This is gold for creating depth, texture, and dramatic shadows. It sculpts your subject, making it three-dimensional.
- Back Light: Light coming from behind your subject. Perfect for creating dramatic silhouettes or a beautiful "rim light" effect that outlines your subject with a glow.
- Top/Bottom Light: Can be tricky. Top light (like a ceiling fixture) can create harsh shadows under eyes. Bottom light (rare, think campfire from below) can be spooky.
3. Color Temperature: The Mood Setter Light isn't just bright or dim; it has a color!
- Warm Light: Yellow, orange, red tones. Think sunset, candles, incandescent bulbs. Creates a cozy, inviting, nostalgic feel.
- Cool Light: Blue, white tones. Think overcast sky, fluorescent lights, early morning light. Creates a clean, crisp, sometimes sterile feel.
My Personal Aha! Moment: I learned this the hard way trying to photograph intricate mosaics in a Moroccan riad in Marrakech. The direct afternoon sun blasting through an open archway made the colors harsh and created distracting hot spots. But then I noticed a corner where the light was bouncing off a white wall, creating a softer, more even illumination. Moving my camera there, the subtle blues, greens, and golds of the mosaics truly popped, revealing their intricate beauty without glare. It wasn't about more light; it was about better light. So, before you even lift your camera, pause. Look around. Where is the light coming from? Is it hard or soft? What color is it? This observation is the first, crucial step to stunning indoor shots.
The Magic of the Window: Harnessing Natural Light Indoors
When it comes to indoor photography, natural light is your MVP. It’s free, abundant (most of the time!), and often the most flattering. A window isn't just for looking out; it's a giant, natural softbox!
1. Embrace the Window Glow:
- Position Your Subject (or Yourself) Near a Window: This is the golden rule. The closer you are, the softer and more abundant the light will be. If you're photographing food, place it on a table right next to a window. For a person, have them face the window.
- Use Sheer Curtains as Diffusers: If the light streaming through the window is too harsh (creating strong, dark shadows), close the sheer curtains. They act like a professional diffuser, scattering the light and making it beautifully soft and even. I've done this in countless hotel rooms, from a chic boutique stay in Bali to a rustic Airbnb in the Dolomites, instantly transforming the light.
- Reflectors Are Your Friends (DIY Edition!): Sometimes, even with window light, one side of your subject might be a bit too dark. This is where a reflector comes in. You don't need a fancy collapsible disc! A white piece of cardstock, a menu from a cafe, a white napkin, or even a white wall can bounce light back onto the darker side of your subject, filling in shadows and adding sparkle. I once captured a stunning shot of my cappuccino in a cozy Kyoto teahouse; the morning sun through the rice paper screens was a dream, but one side of the cup was a little dim. A simple white napkin propped up on the table bounced just enough light back to make the foam perfectly luminous. Voila! Insta-perfection achieved for the price of a coffee.
- Chase the Indoor Golden Hour: Just as the "golden hour" outside creates magical light, the morning and late afternoon sun streaming into an indoor space can be breathtaking. Look for those long, dramatic shadows and warm shafts of light. This is perfect for capturing the mood of a historic museum gallery in Rome, a quiet reading nook in a charming English cottage, or a bustling market stall in Chiang Mai where the light filters through the awnings.
Location Inspiration: Think about those gorgeous cafes with large windows, your hotel room with a balcony door, or even a brightly lit corridor in a beautiful old building. These are prime locations to practice harnessing natural light.
Beyond the Flash: Mastering Artificial Light Sources
Natural light isn't always available, especially in the evening, in dimly lit museums, or during a moody dinner. But fear not! You can still create stunning shots by intelligently using artificial light.
1. Befriend Existing Lamps:
- Move Them! Don't be afraid to reposition a table lamp or floor lamp to get the light where you need it. Angle it to create soft side light, or bounce it off a wall for a diffused effect.
- Look for Soft, Diffused Light: Lamps with shades (especially cream or white ones) are your best bet. Avoid direct, bare bulbs, which create harsh light. If a lamp has a dimmable switch, even better – you control the intensity.
- Mind the Color: Remember color temperature? Lamps often emit warm, yellowish light. Embrace it for a cozy, inviting feel, or adjust your camera's white balance (or in post-processing) if you want a more neutral look.
2. Candles: Ambiance & Soft Glow:
- Embrace the Warmth: Candles are fantastic for creating intimate, romantic, or mysterious vibes. They cast a beautiful warm glow.
- How to Shoot Them: To capture their delicate light without motion blur, you'll need a steady hand or a mini-tripod (like a Joby Gorillapod, which costs around $20-30). Use a low ISO (to reduce grain), a wide aperture (if your camera allows, for a blurry background), and a slightly slower shutter speed. Focus on the flame or the object illuminated by the candle.
- Anecdote: Dining in a cave restaurant in Cappadocia, Turkey, the only light came from these beautiful, flickering lanterns. My phone flash was useless and would have ruined the mood. Instead, I learned to angle my phone to capture the lantern's glow, using its soft light to create dramatic, dancing shadows on the ancient stone walls. The result was pure magic.
3. Smartphone Flash Hacks (Use with Caution!):
- NEVER Point Directly: The built-in phone flash is notoriously harsh. Direct flash kills ambiance and creates unflattering shadows.
- Diffuse It: If you absolutely must use your phone flash, try diffusing it. Place a thin piece of tissue paper or a translucent business card over the flash. It's not perfect, but it's better than nothing.
- Bounce It: If there's a white wall or ceiling nearby, try holding your finger partially over the flash and aiming your phone so the flash bounces off the surface. This creates a larger, softer light source.
4. Portable LED Lights: Small but Mighty:
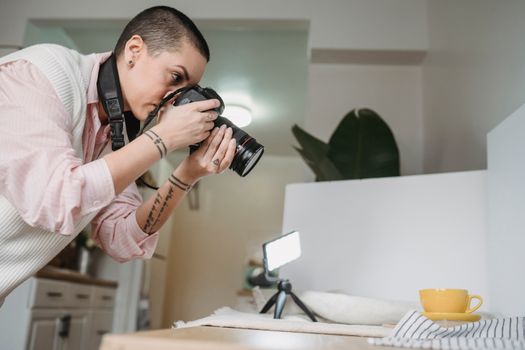
- For a step up, consider investing in a small, portable LED panel. Brands like Lume Cube Mini or Ulanzi VL49 are compact, rechargeable, and offer adjustable brightness and sometimes even color temperature. They cost around $20-$50 and can be a lifesaver for illuminating subjects in truly dark spaces, providing a soft, controllable fill light. I always pack a small LED panel when I'm traveling to places like night markets in Bangkok or dimly lit art galleries, giving me that extra bit of controlled light without being intrusive.
Creative Play: Silhouettes, Shadows, and Bokeh Dreams
Once you understand how light works, you can start playing with it to create truly artistic and memorable shots. Don't just expose for your subject; expose for the story the light tells.
1. Master the Art of the Silhouette:
- The Setup: Place your subject directly in front of a much brighter light source – typically a window or an open doorway with bright light beyond.
- The Technique: Expose for the background light, not your subject. On a smartphone, tap on the bright background to set the exposure. Your subject will then become a dark, intriguing silhouette.
- Storytelling: Silhouettes are fantastic for conveying mood, mystery, and a sense of place without revealing specific details. I once captured a stunning silhouette of a local artisan working in a dimly lit workshop in Hoi An, Vietnam, with the bright doorway framing him perfectly. It told a powerful story of craftsmanship and tradition.
2. Embrace Dynamic Shadows:
- Side Light is Key: When light comes from the side, it creates fascinating shadows that add depth, texture, and drama to your photos. Don't be afraid of shadows; learn to love them!
- Look for Patterns: Sunlight filtering through blinds, decorative screens, or even tree branches outside a window can cast beautiful, intricate shadow patterns on walls or floors. These are fantastic compositional elements.
- Anecdote: Walking through the narrow streets of Chefchaouen, Morocco, the blue city, the sunlight bounced off the walls, creating incredible light and shadow play. I focused on capturing the geometric shadows cast by doorways and windows, turning simple architectural details into abstract art.
3. Bokeh: The Dreamy Background Blur:
- What is Bokeh? It's that beautiful, creamy blur in the background of your photo, often seen as soft, out-of-focus circles of light. It makes your subject pop and adds a professional, dreamy quality.
- How to Achieve It:
- Wide Aperture: If your camera has aperture control (like a mirrorless or DSLR), use a wide aperture (e.g., f/1.8, f/2.8). Many modern smartphones have a "Portrait Mode" that simulates this effect.
- Distance: Get physically closer to your subject, and ensure there's a good distance between your subject and the background.
- Background Lights: Bokeh is most pronounced when there are small, bright points of light in the background – think fairy lights in a restaurant, distant city lights through a window, or even reflections. I love using fairy lights in cafes or my own hotel room to create magical bokeh backgrounds for my food or portrait shots.
Post-Processing Power-Up: Enhancing Your Luminous Vision
Even with the best lighting techniques, post-processing is where you can truly fine-tune your vision and make your indoor shots shine. It's not about fabricating; it's about enhancing what was already there.
1. Exposure & Highlights/Shadows:
- The Basics: Adjust overall exposure to brighten or darken your image.
- Recover Detail: Use the "Highlights" slider to bring back detail in overly bright areas (like a window) and the "Shadows" slider to lift detail from dark areas without blowing out your highlights. This is incredibly powerful for indoor shots where you often have a wide range of light and dark.
2. White Balance: Correcting Color Casts:
- The Problem: Indoor lights (lamps, fluorescents) often cast a warm yellow or cool blue tint on your photos. Your camera tries to guess the "correct" white balance, but it's not always right.
- The Fix: Use the "White Balance" tool (often labeled "Temp" or "Tint") to neutralize these color casts. Slide towards blue to cool down a warm image, or towards yellow to warm up a cool image. This is crucial for making whites look white and colors appear natural.
- Anecdote: After a shoot in a gorgeous but slightly underexposed church in Rome, the ancient stone and frescoes had a weird yellow-orange cast from the old incandescent bulbs. A few quick tweaks to the white balance in Lightroom Mobile instantly brought out the frescoes' vibrant colors and the play of light on the ancient stone. It was like magic!
3. Contrast & Clarity:
- Make Light Pop: Increasing contrast can make your brights brighter and your darks darker, adding punch and drama.
- Add Definition: The "Clarity" slider can enhance mid-tone contrast, making details appear sharper without over-sharpening. Use sparingly for a natural look.
4. Grain/Noise Reduction:
- The Low-Light Challenge: Indoor shots, especially in dim light, often result in "noise" or "grain" – those tiny colored speckles.
- The Solution: Most editing apps have a "Noise Reduction" slider. Use it gently, as too much can make your photos look plasticky.
Recommended Editing Apps:
- Lightroom Mobile (Free & Paid): My absolute go-to. Powerful controls, intuitive interface.
- Snapseed (Free): Google's fantastic, user-friendly editor with great selective adjustment tools.
- VSCO (Free & Paid): Known for its beautiful film-like filters, but also offers solid editing tools.
Simple Gear, Big Impact: Your Lighting Toolkit
You don't need a professional studio setup to get amazing results. Here are a few affordable items that can significantly elevate your indoor photography:
- Collapsible Reflector (5-in-1): While I mentioned DIY options, a small 5-in-1 reflector (usually around $15-25) is incredibly versatile. It includes white (for soft fill), silver (for punchier fill), gold (for warm fill), black (for blocking light/creating shadows), and a translucent diffuser. It folds down small and is a pro's secret weapon.
- Mini Tripod (Joby Gorillapod or similar): For those low-light, long-exposure shots (like candles or night scenes), a stable base is essential. A flexible mini-tripod can grip onto railings, sit on tables, and costs around $20-30.
- Portable LED Panel: As mentioned earlier, a small, rechargeable LED light (e.g., Lume Cube Mini, Ulanzi VL49) can be a fantastic addition for controlled fill light or creative effects, typically $20-$50.
- Smartphone Lenses (Optional): Clip-on wide-angle or macro lenses can open up new creative possibilities for indoor shots, allowing you to capture more of a spacious interior or focus on tiny details. Prices vary wildly, but decent ones can be found for $15-$50.
Remember, the best gear is the gear you have with you and know how to use. These additions simply enhance your existing capabilities.
The Art of Seeing: Practice Makes Perfect (and Luminous!)
Ultimately, the biggest "trick" to stunning indoor shots isn't a piece of gear or a specific setting; it's training your eye to see the light. It's a skill, and like any skill, it improves with practice.
- Become an Observer: Whenever you enter an indoor space, whether it's your living room, a restaurant, or a museum, take a moment to consciously observe the light. Where is it coming from? Is it warm or cool? Hard or soft? What kind of shadows is it creating?
- Challenge Yourself: Dedicate a specific photography session to only shooting indoors. Give yourself a theme – perhaps "the light in my kitchen" or "cozy corners." Move objects around, try different angles, experiment with natural light versus lamps.
- Learn from Others: Study photos you admire. Analyze how the photographer used light. Was it a window? A lamp? How did they manage the shadows?
- Experiment Fearlessly: Don't be afraid to try weird angles or unconventional light sources. Sometimes the "wrong" way can lead to the most interesting results.
My Lockdown Revelation: During the pandemic lockdowns, my apartment became my personal photo lab. I practiced these tricks daily, moving objects around, playing with lamps, and even using my phone's flashlight bounced off a wall. Now, when I travel, spotting good light is second nature. It's like I have a superpower!
Your Luminous Journey Begins Now!
Don't let dim interiors dim your travel memories anymore. The world is full of incredible indoor spaces, from grand cathedrals to intimate cafes, and each one holds the potential for a breathtaking photograph. By understanding and manipulating light, you're not just taking a picture; you're capturing the very essence and emotion of a place.
These lighting tricks aren't just for professional photographers; they're for anyone with a camera (even just a smartphone!) who wants to elevate their travel storytelling. They're about seeing the world with a more discerning, artistic eye.
Now it's your turn! Grab your camera (or just your phone!), find a cozy corner, and start experimenting. Play with that window light, artfully arrange a lamp, or create a dramatic silhouette. The possibilities are endless, and the results will be incredibly rewarding.
Share your stunning indoor shots with us using #TripsoraLightHacks and tag @TripsoraTravel on Instagram! We can't wait to see your luminous creations and feature our favorites. What's your favorite indoor lighting trick you've discovered? Share your wisdom in the comments below!
---