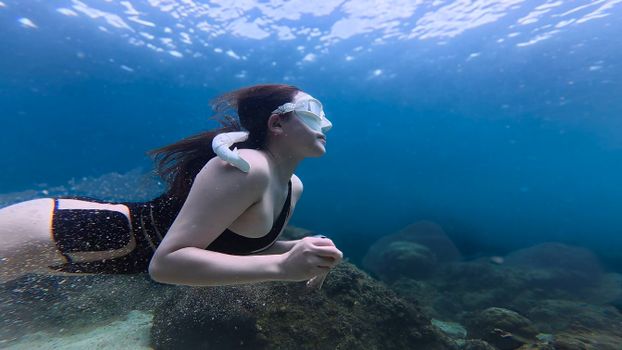
The first time I came face-to-face with a manta ray, it was off the coast of Nusa Penida, Indonesia. This magnificent creature, easily twice my size, glided past with an otherworldly grace, its mouth agape, filtering plankton. I was mesmerized, utterly speechless, and my heart pounded a rhythm against my wetsuit. It was a moment of pure, unadulterated magic. And you know what I had to capture it? My brain. That’s it. My phone was safely stowed away on the boat, and I hadn’t yet invested in any proper underwater gear. The memory is seared into my mind, yes, but oh, how I wished I had a tangible reminder, a photograph that could convey even a fraction of that awe-inspiring encounter.
That moment ignited a fire within me. I realized that while experiences live in our hearts, sharing them, reliving them, and preserving them for future generations is a powerful act. Especially when those experiences involve the fragile, breathtaking beauty of our oceans. We live in a world where the wonders beneath the waves are facing unprecedented challenges, and capturing their majesty feels more urgent than ever. It's about more than just a pretty picture; it's about connecting, inspiring, and advocating.
So, if you’re like me, a travel enthusiast with a deep love for the ocean, yearning to bring back more than just stories from your aquatic adventures, you’re in the right place. This isn't just a gear guide; it's an invitation to unlock a new dimension of your travels. Forget the intimidating jargon and the sky-high price tags you might associate with professional setups. We’re talking about beginner-friendly, accessible underwater photography gear that will let you experience and capture the ocean's wonders before… well, you know. Before it's too late, and before you miss another unforgettable moment. Let’s dive in!
Why Bother? The Irresistible Pull of the Deep and Your Inner Explorer
Why should you even consider adding underwater photography to your travel repertoire? Because it transforms your entire experience. Suddenly, every snorkeling session isn't just a swim; it's a treasure hunt for the perfect shot. Every dive becomes an artistic endeavor. You observe marine life with a keener eye, appreciate the intricate details of coral, and learn to anticipate the movements of a curious clownfish.
It’s easy to feel overwhelmed by the thought of underwater photography. "It's too expensive!" "It's too complicated!" "I'm not a professional!" I hear you, because I've said all those things myself. But here's the secret: you don't need to be a pro to start. You need curiosity, a love for the ocean, and a willingness to learn. The goal isn't to win awards (though who knows, you might!). The goal is to capture your personal journey, to share the magic you witness, and to create lasting memories. Think of it as an extension of your travel diary, but with fins and a mask.
And let's be real: underwater photos are insanely shareable. Your Instagram feed will thank you. Your friends will be amazed. You'll inspire others to explore the underwater world, too. It’s a win-win-win!
The Gateway Drug: Action Cameras & Basic Housings (Your First Dip)
For most beginners, the journey into underwater photography starts here. These are the workhorses, the adventure companions, the cameras that are tough enough to handle a few bumps and splashes while still delivering surprisingly good results.
1. The Mighty GoPro (Hero 9/10/11/12 Black)
Why it’s awesome for beginners: GoPro is practically synonymous with action cameras, and for good reason. They are incredibly user-friendly, compact, and designed for adventure. Most recent models are waterproof out of the box to about 10 meters (33 feet), which is perfect for snorkeling and shallow dives. But for true underwater photography, especially deeper dives, you'll absolutely want an additional dive housing.
- Pros:
- Durability: Built like a tank, ready for anything.
- Compact & Lightweight: Easy to pack, easy to hold underwater.
- User-Friendly: Simple interface, often one-button operation.
- Wide-Angle Lens: Great for capturing expansive reefscapes and large animals.
- Excellent Video: GoPro truly shines here, capturing smooth, vibrant footage.
- Affordable Entry: Compared to other setups, it’s a budget-friendly starting point.
- Cons:
- Smaller Sensor: Image quality won't match larger cameras, especially in low light.
- Limited Manual Control: You’re mostly relying on automatic settings.
- No Optical Zoom: What you see is what you get.
- Color Correction Needed: Underwater, colors disappear quickly. You’ll need filters or post-processing.
Essential Accessories for Your GoPro:
- Dive Housing: Even if your GoPro is waterproof, a dedicated dive housing (like GoPro's own Protective Housing + Waterproof Case or third-party options) allows you to go much deeper (e.g., 60m/196ft) and adds an extra layer of protection. This is non-negotiable for diving. (Approx. $50-$100)
- Red/Magenta Filter: This is crucial! As you go deeper, red light is absorbed first, making everything look blue/green. A red filter (for blue water) or magenta filter (for green water, like lakes) corrects this, bringing back vibrant colors. (Approx. $20-$40)
- Floating Hand Grip/Pole: Keeps your GoPro from sinking if you drop it and provides a stable grip. (Approx. $15-$30)
- Anti-Fog Inserts: Prevents condensation inside the housing, which can ruin your shots. (Approx. $10 for a pack)
My Experience: My first proper underwater photos were with a GoPro Hero 7 in a rented dive housing in Tulum, Mexico. Snorkeling through the mystical Gran Cenote, the wide-angle lens perfectly captured the ethereal light rays piercing through the clear freshwater, illuminating ancient stalactites. The red filter was a game-changer for the vibrant fish I saw in the Caribbean Sea afterward. It proved that you don't need a huge, expensive setup to capture truly memorable moments.
Price Point: A new GoPro Hero 11/12 Black is around $300-$400. Add $100-$200 for essential accessories, and you’re looking at ~$400-$600 for a complete beginner setup.
2. The Robust Compact: Olympus Tough TG-6 (and similar)
Why it’s a step up: For those who want slightly better image quality and more control than a GoPro, but still crave portability and ease of use, a rugged compact camera like the Olympus Tough TG-6 is a phenomenal choice. It’s built to withstand abuse, waterproof to 15m (50ft) without a housing, and offers fantastic macro capabilities.
- Pros:
- Excellent Image Quality: Larger sensor than a GoPro, leading to sharper photos with more detail.
- Superb Macro Mode: Incredible for capturing tiny critters like nudibranchs and small fish.
- Built-in Waterproofing: Ready for snorkeling and shallow dives right out of the box.
- More Manual Control: Offers aperture priority and custom white balance, giving you more creative freedom.
- RAW Capture: Allows for more flexibility in post-processing.
- Cons:
- External Housing for Deeper Dives: Still needs a dedicated housing (e.g., Olympus PT-059) for depths beyond 15m.
- No Interchangeable Lenses: You're limited to the built-in lens, though wet lenses can be added.
- Auto-focus can be slow in low light.
Essential Accessories for Your TG-6:
- Underwater Housing: For diving deeper than 15m, the Olympus PT-059 housing is fantastic. (Approx. $300-$400)
- Tray and Handles: Provides a stable platform for your camera and housing, making it easier to hold and attach lights. (Approx. $50-$150)
- Small Video Light/Strobe: Even a small light can dramatically improve color and contrast, especially for macro shots. (Approx. $100-$300)
- Wet Lenses (Optional but Recommended):
- Wide-angle Wet Lens: Attaches to the front of the housing to expand your field of view for reefscapes.
- Macro Wet Lens: Magnifies tiny subjects even further, perfect for super-macro.
My Experience: Upgrading to an Olympus TG-5 (the predecessor to the TG-6) with its housing was a revelation during a trip to the Philippines. At Moalboal, the sardine run was an overwhelming spectacle, and the TG-5, with its wider lens, managed to capture the sheer scale of the swirling bait ball. Later, in the coral gardens of Malapascua, its macro mode allowed me to zoom in on intricate coral polyps and a tiny pygmy seahorse, revealing details I would have completely missed with a GoPro. The ability to adjust white balance manually made a huge difference in bringing out the true colors.
Price Point: An Olympus TG-6 is around $450-$500. Add $300-$400 for a housing, and another $100-$300 for a basic light and tray, bringing your total to ~$850-$1200. This is a significant jump but offers a substantial improvement in image quality and creative control.
Stepping Up: Mirrorless Systems (The Serious Hobbyist's Dream)
If you've caught the underwater photography bug and are ready for professional-level image quality without the bulk of a traditional DSLR, mirrorless cameras are your next logical step. They offer larger sensors, interchangeable lenses, and extensive manual controls, all in a more compact body than DSLRs.
Why go mirrorless? Superior image quality, better low-light performance, faster autofocus, and the flexibility of interchangeable lenses mean you can adapt your setup for wide-angle reefscapes or intricate macro shots. However, this also means a significant jump in cost and complexity.
Key Components of a Mirrorless Underwater Setup:
- Camera Body:
- Micro Four Thirds (M4/3): Excellent balance of size, performance, and lens selection. Cameras like the Olympus OM-D E-M5 Mark III or Panasonic Lumix GH5/GH6 are popular choices. They offer great image quality and a vast array of compact, high-quality lenses.
- APS-C: Slightly larger sensor than M4/3, offering even better low-light performance and dynamic range. Sony Alpha a6000 series (e.g., a6600), Fujifilm X-T series (e.g., X-T30), or Canon EOS M series are great options.
- (Full-frame mirrorless cameras exist, but they are generally for advanced professionals due to their larger housings, lenses, and much higher cost.)
- Underwater Housing: This is where a big chunk of your budget goes. Housings for mirrorless cameras are precision-engineered to be completely watertight and allow access to all camera controls. They are specific to your camera model.
- Top Brands: Ikelite, Nauticam, Sea&Sea, Fantasea, Isotta.
- Always research compatibility carefully. A housing for an E-M5 Mark II will not fit an E-M5 Mark III.
- Lenses: Your choice of lens dictates what you can shoot.
- Wide-Angle Lenses: Essential for capturing expansive reefscapes, wrecks, or large marine animals like sharks, manta rays, and whale sharks. Popular choices include the Panasonic Lumix G Fisheye 8mm f/3.5 or the Olympus M.Zuiko Digital ED 9-18mm f/4.0-5.6.
- Macro Lenses: For capturing the intricate beauty of small critters like nudibranchs, pipefish, and tiny crabs. The Olympus M.Zuiko Digital ED 60mm f/2.8 Macro or Panasonic Lumix G Macro 30mm f/2.8 are fantastic.
- Lighting: The ocean quickly saps color, even with the best camera. External lighting is absolutely crucial for bringing back vibrant colors and contrast.
- Strobes (Underwater Flashes): Provide a burst of light, freezing motion and bringing out true colors. They are essential for wide-angle and macro photography. Brands like Inon (e.g., Z-330) and Sea&Sea (e.g., YS-D3) are industry standards. You'll need sync cords to connect them to your housing.
- Video Lights (Constant Lights): Great for video, focusing light for macro photography, or adding fill light to wide-angle shots. Brands like Keldan, Sola, and Bigblue offer excellent options.
- Accessories:
- Tray and Handles: Provides a stable platform for your camera and housing, and points to attach your strobes/lights. Essential for ergonomics and stability.
- Dome Ports: For wide-angle lenses, a dome port corrects refraction underwater, allowing you to maintain your lens's wide field of view and achieve clear split shots (half-in, half-out of water).
- Flat Ports: Used for macro lenses, these provide a flat optical window for sharp close-up images.
- Buoyancy Arms: Connect your strobes/lights to your tray. They often contain air or foam to help offset the negative buoyancy of your setup, making it easier to handle underwater.
- Spare O-rings & Grease: Regular maintenance of your housing's O-rings is paramount to prevent leaks. Always carry spares and O-ring grease.
- Moisture Absorbers/Silica Gel: Place these inside your housing to prevent fogging, especially in humid climates.
My Experience: My first serious mirrorless setup was an Olympus OM-D E-M5 Mark II with an Ikelite housing, an Olympus 60mm macro lens, and a single Inon Z-240 strobe. It felt like holding a small car underwater at first! The learning curve was steep. My first attempts at macro in Lembeh Strait, Indonesia – the "critter capital of the world" – were humbling. I missed focus constantly, my buoyancy was terrible, and my strobe placement was all wrong. But gradually, with practice, I started nailing shots. The thrill of capturing the intricate patterns on a tiny frogfish or the delicate dance of a pygmy seahorse was beyond rewarding.
Later, upgrading to a wide-angle lens and a dome port, I chased whale sharks in Oslob, Philippines. The sheer size of these gentle giants was overwhelming, and the wide-angle lens, combined with a powerful strobe, finally allowed me to capture the scale and vibrant blues of the ocean in a way my GoPro never could. The difference in image quality was astounding, and the ability to manually control every aspect of the shot gave me immense creative freedom. It's an investment, yes, but the results are truly breathtaking.
Price Point: This is where things get serious. A basic mirrorless setup (camera body, housing, one lens, one strobe, tray/arms) can start from $2,500 - $5,000+. If you add a second strobe, another lens, and more advanced accessories, it can easily climb to $7,000 - $10,000+. This is a commitment, but for the serious enthusiast, it's worth every penny for the images you'll create.
Essential Accessories & The Unsung Heroes of Underwater Photography
Beyond the camera and housing, a few key accessories can make or break your underwater photography experience. Don't skimp on these!
- Red/Magenta Filters (Revisited): As mentioned, these are vital for GoPros and compacts shooting without external strobes, especially in depths from 5-20 meters. They passively correct for color loss, giving your images a more natural look.
- Strobes & Video Lights (Diving Deeper): I cannot emphasize enough how critical external lighting is for truly vibrant underwater photos and videos. Even with the best camera, without a strobe, your images will appear flat, blue, and lifeless as you descend. Strobes bring back reds, oranges, and yellows that the water column absorbs. Video lights are fantastic for constant illumination, especially for macro video or as a focus light for your camera.
- Dome Ports vs. Flat Ports:
- Dome Ports: Used for wide-angle lenses. The dome shape helps to correct for the magnification effect of water, allowing your wide-angle lens to retain its full field of view and focus. Essential for reefscapes and large animals.
- Flat Ports: Used for macro lenses. They provide a flat optical surface for sharp, undistorted close-up images of small subjects.
- Buoyancy Arms & Trays: More than just mounting points for your lights, buoyancy arms help balance your camera system underwater. A heavy setup can be tiring to maneuver; buoyant arms make it feel almost weightless, allowing for smoother movements and better composition. Trays provide a stable, two-handed grip, reducing camera shake.
- Moisture Absorbers/Silica Gel: These small sachets absorb any residual moisture inside your housing, preventing condensation from fogging up your port. A foggy port is a ruined shot!
- Spare O-rings & Grease: Always, always, always carry these. O-rings are the seal that keeps your camera dry. They can get pinched, nicked, or dry out. Knowing how to clean, grease, and replace them is a fundamental skill for any underwater photographer. Don't be "that person" who floods their camera because of a poorly maintained O-ring.
- Dive Computer & Safety Gear: This isn't photography gear, but it's paramount. Photography should never compromise your safety or the safety of your dive buddy. Always monitor your air, depth, and bottom time. A good dive computer is non-negotiable.
Beyond the Gear: Mastering the Craft (Tips for Beginners)
Having the right gear is only half the battle. The other half is knowing how to use it, and more importantly, how to behave responsibly underwater.
- Practice, Practice, Practice: Don't wait for your dream dive trip to try out your new gear. Start in a swimming pool! Get comfortable with your camera, housing, and controls. Then move to shallow, calm water. The more you practice, the more intuitive it becomes.
- Buoyancy Control is KING: This is the single most important skill for any underwater photographer. Excellent buoyancy control means you can hover effortlessly, get into position for a shot without kicking up sand, and most importantly, avoid touching or damaging the delicate reef and marine life. If your buoyancy isn't dialed in, your photos will suffer, and the environment will, too. Take a PADI Peak Performance Buoyancy specialty course if you need to!
- Get Close (Then Get Closer!): Water is 800 times denser than air, and it's full of particles. The more water between your lens and your subject, the more blurry, blue, and less vibrant your image will be. Minimize the water column by getting as close as possible without disturbing the marine life. This is why wide-angle and macro lenses are popular – they allow you to fill the frame while being close.
- Shoot Upwards: Whenever possible, try to shoot your subject with the sun behind it, looking slightly upwards. This creates more dramatic lighting, better separation between your subject and the background, and helps reduce distracting backscatter (those annoying white dots caused by light reflecting off particles in the water). My early photos were always shooting down, resulting in flat, uninspired images. The moment I started consciously shooting up changed everything.
- Understand Light: Natural light diminishes quickly underwater. Learn how your red/magenta filters work, and then experiment with your strobes or video lights. Pay attention to how the light falls on your subject and adjust your strobes for even illumination without harsh shadows.
- Composition Matters: Even underwater, basic photography principles apply. Use the rule of thirds, look for leading lines, frame your subject, and think about negative space. A well-composed photo tells a story.
- Post-Processing is Your Friend: Don't expect perfect images straight out of the camera. A little bit of post-processing (adjusting white balance, contrast, saturation, and sharpness) can dramatically enhance your underwater photos. Software like Adobe Lightroom is excellent for this.
- Respect Marine Life (Ethical Photography): This is non-negotiable. Never chase, harass, touch, or feed marine animals for a photo. Never touch or stand on coral. Be a responsible diver and photographer. Your shot is never worth harming the environment. Preserve the beauty you seek to capture.
Your Underwater Legacy Awaits!
The ocean is a realm of unparalleled beauty, mystery, and wonder. It's a world that truly needs to be seen and experienced to be believed. And with the right beginner-friendly gear, you can do more than just witness it; you can capture its magic, share its stories, and inspire others to protect it.
Don't let the technicalities intimidate you. Start simple, learn as you go, and most importantly, enjoy the incredible journey. Whether it's a vibrant coral garden in Raja Ampat, a curious sea lion in the Galapagos, or the intricate patterns on a tiny nudibranch in Lembeh, these are moments that deserve to be immortalized. These are experiences you absolutely need to have, and capture, before you die.
So, what are you waiting for? That manta ray in Nusa Penida still haunts my memory, but now, I’m ready. My gear is packed, my O-rings are greased, and my buoyancy is dialed in. Your underwater photography adventure starts now.
What's on your underwater photography bucket list? Share your favorite dive spots and dream gear in the comments below! Don't forget to tag us @Tripsora and use #UnderwaterLegacy when you share your breathtaking shots on social media. Let's inspire each other to dive deep and capture the magic!
---