Underwater Photography Gear for Beginners: Your Dive into Mind-Blowing Shots!
The world beneath the waves. It’s a realm of surreal beauty, vibrant colors, and encounters that etch themselves into your soul. From the graceful dance of a manta ray in Nusa Penida to the intricate patterns of a pygmy seahorse clinging to coral in Raja Ampat, these moments are pure magic. But how many times have you surfaced, heart pounding, brimming with stories, only to wish you had a way to truly show someone what you saw?
I know the feeling. My first few dives were a blur of awe and frustration. I’d point excitedly at a majestic reef shark, try to describe the kaleidoscope of colors, and my friends would politely nod. My phone, safely tucked away in a dry bag, felt miles away from the action. Then, one day in the crystal-clear waters of Koh Lanta, Thailand, I finally took the plunge (pun intended!) into underwater photography. My first attempt was with a basic action camera, and let me tell you, the initial results were... blue. Very, very blue. And blurry. But that tiny spark of capturing something from the deep ignited a passion that has since taken me around the globe, from the chilly fjords of Norway to the bustling reefs of the Philippines.
If you’re reading this, chances are you’ve felt that same pull. You want to freeze those fleeting moments, bring the ocean’s grandeur to life, and share its wonders with the world. And guess what? You don't need to be a seasoned pro with a five-figure camera rig to start. This guide is for you, the aspiring underwater shutterbug, the beginner eager to capture mind-blowing shots without blowing your budget or your mind trying to figure out complex gear. Let's dive in!
1. The Absolute Basics: Starting Small & Smart (Your First Splash!)
When you’re just starting, the key is to keep it simple, accessible, and fun. You want to build confidence and learn the basics of composition and light before investing in heavy-duty equipment.
A. Action Cameras: The Gateway Drug to Underwater Photography
- My Go-To Recommendation: GoPro Hero Series (e.g., Hero 11/12 Black) or DJI Osmo Action 4.
- Why they're great for beginners:
- Built-in Waterproofing: Most recent models are waterproof up to 10 meters (33 feet) without a housing. For deeper dives (e.g., scuba), you'll need an external housing (more on that later).
- Compact & Lightweight: Easy to carry, doesn't add much bulk to your dive kit.
- Excellent Video Quality: GoPros are kings of video, perfect for capturing dynamic marine life.
- User-Friendly: Simple interface, quick to learn.
- Relatively Affordable: A new GoPro typically costs between $300-$500 USD.
- The Downside (and how to mitigate it):
- Fixed Lens: No optical zoom, so you need to get close to your subject (without disturbing it!).
- Low Light Performance: Can struggle in deeper, darker conditions without external lighting.
- Limited Manual Control: Less flexibility for advanced settings compared to dedicated cameras.
- "Blueish" Photos: Without color correction (filters or post-processing), everything looks blue/green.
- Personal Anecdote: My first real "wow" moment with underwater photography was with a GoPro Hero 7 in the Philippines, snorkeling with whale sharks in Oslob. The wide-angle lens captured the sheer scale of these gentle giants perfectly. I learned quickly that getting close was key, and even with the blue tint, the sheer thrill of having any photo of that experience was unforgettable.
- Pro Tip for Beginners: Don't just point and shoot! Hold the camera steady, get as close as safely possible, and try to capture the subject in good natural light.
B. Compact Cameras with Underwater Housings: Stepping Up Your Still Game
- My Go-To Recommendation: Canon G7X Mark III or Sony RX100 Series (e.g., RX100 VII).
- Why they're a great next step:
- Better Image Quality: Larger sensors generally mean sharper images, better low-light performance, and more detail.
- Optical Zoom: Allows for more flexibility in framing your shots without needing to get as close.
- RAW Capture: Provides much more flexibility for post-processing and color correction.
- More Manual Control: Aperture, shutter speed, ISO – giving you creative freedom.
- The Catch:
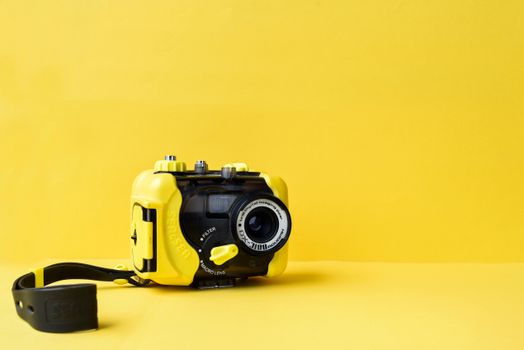
- Requires an External Housing: These cameras are not waterproof on their own. You'll need a dedicated underwater housing, which adds to the cost and bulk.
- Higher Overall Cost: A good compact camera can run $700-$1000, and a reliable housing another $300-$600.
- Personal Anecdote: After my GoPro adventures, I found myself wanting more detail, especially for macro shots of nudibranchs and tiny critters. Upgrading to a Canon G7X Mark II with a Fantasea housing was a game-changer. Suddenly, the vibrant colors of the coral reefs in Komodo National Park truly popped, and I could capture the intricate patterns of a moray eel's skin. The learning curve was steeper, but the results were incredibly rewarding.
- Pro Tip for Beginners: If you're serious about taking stunning stills, a compact camera with a housing is an excellent long-term investment. Start with auto mode, then gradually experiment with aperture priority to control depth of field.
2. Essential Accessories: Your Underwater Photography Superpowers
Once you have your camera, a few key accessories will transform your "okay" shots into "OMG!" moments. Don't skip these!
A. The Indispensable Underwater Housing (for Non-GoPro Cameras)
- What it is: A robust, waterproof case specifically designed for your camera model.
- Why it's crucial: It protects your camera from water pressure and leaks, allowing you to dive much deeper than the camera's inherent waterproof rating.
- Types & Brands:
- Plastic Housings (e.g., Fantasea, Ikelite, Meikon): More affordable ($300-$700), lighter, great for beginners. They're typically rated for 40-60 meters (130-200 feet).
- Aluminum Housings (e.g., Nauticam, Sea&Sea): More expensive ($1500+), extremely durable, often offer more advanced controls. Generally for serious enthusiasts.
- My Advice: For beginners, a good quality plastic housing from a reputable brand is perfect. Ensure it's specifically for your camera model – universal housings are often a compromise.
- Maintenance Tip: Always, always, ALWAYS check your O-rings before every dive. A tiny speck of hair or sand can cause a catastrophic leak. Carry O-ring grease and a cleaning cloth.
B. Red Filters & Color Correction: Banishing the Blues
- What they are: Colored filters (usually red or magenta) that attach to your camera lens or housing.
- Why they're vital: Water absorbs red and orange light very quickly. Without a filter, everything deeper than a few feet will look monochromatic blue or green. Red filters counteract this, bringing back the natural warmth and vibrancy of the underwater world.
- Types:
- Red Filters: For blue water (oceans).
- Magenta Filters: For green water (lakes, some coastal areas).
- Depth Specificity: Some filters are designed for shallow water (5-20 meters), others for deeper water (20+ meters). You might need different filters for different dive profiles.
- My Anecdote: My first GoPro videos were a sea of muted blues. I was frustrated. Then, on a dive trip to the Similan Islands, my dive guide recommended a simple snap-on red filter. The difference was night and day! Suddenly, the corals glowed with their true oranges and purples, and the fish regained their brilliant hues. It was like seeing the ocean for the first time, again.
- Cost: Expect to pay $30-$100 for a good quality filter.
- Pro Tip: Remove your filter for very shallow water (less than 5 feet) or when using external strobes/video lights, as it can cause an unnatural red tint.
C. Underwater Lighting: Shedding Light on the Deep
- What it is: External lights (video lights or strobes) that illuminate your subject.
- Why you need it: Even with a red filter, natural light diminishes quickly underwater. Lights restore color, add contrast, and allow for faster shutter speeds, reducing blur.
- Video Lights:
- Pros: Constant light source, great for video, helps with focusing, gives you a preview of your lighting.
- Cons: Can be less powerful than strobes for still photography, can wash out colors if too strong/close.
- Beginner Recommendation: A small, powerful video light (1000-3000 lumens) is an excellent starting point. Brands like SeaLife, Bigblue, and Kraken offer good options around $150-$400.
- Strobes (Flashes):
- Pros: Very powerful, "freezes" motion, restores natural colors beautifully, ideal for still photography.
- Cons: Requires practice to get the positioning right, more expensive, not ideal for video.
- Beginner Recommendation: While more advanced, an entry-level strobe like the Sea&Sea YS-03 or Inon S-2000 (around $300-$500) can elevate your stills dramatically once you've mastered the basics.
- My Experience: I started with a small video light for my compact camera, primarily for focusing in low light and adding a little punch to my macro shots. Later, I added a single strobe, and that's when my wide-angle reef shots truly came alive, revealing the reds and yellows of corals that were otherwise lost in the blue.
- Pro Tip: Start with one video light or strobe. Learn how to position it to avoid backscatter (light reflecting off particles in the water). Angle it slightly away from the camera lens.
D. Buoyancy Arms & Trays: Stability and Versatility
- What they are: A system of handles, trays, and buoyant arms that attach to your camera housing, allowing you to mount lights and providing a stable grip.
- Why they're useful:
- Stability: Holding your camera with two hands on a tray is much more stable than just holding the housing.
- Mounting Points: Provides secure spots for your video lights or strobes.
- Buoyancy: Buoyant arms (often made of carbon fiber) can help offset the negative buoyancy of your camera rig, making it easier to handle underwater.
- Beginner Recommendation: A simple tray with two handles (e.g., from Fantasea, Ikelite) is a great start ($50-$150). You can add arms and clamps later as you get more lights.
- Personal Touch: I initially scoffed at a tray, thinking it was just extra bulk. But after struggling to hold my camera steady with one hand while trying to adjust a light with the other in a strong current in Palau, I quickly invested in one. It made a world of difference in my comfort and the sharpness of my shots.
3. Beyond Gear: Essential Underwater Photography Tips for Beginners
Having the right gear is only half the battle. Your skills and approach underwater are just as, if not more, important.
A. Master Your Buoyancy: The Golden Rule
- Why it's crucial: Poor buoyancy means you're constantly kicking, stirring up sediment, potentially damaging coral, and making it impossible to hold your camera steady for a sharp shot.
- Actionable Advice: Before you even think about photography, become a master of your buoyancy. Take a specialty buoyancy course. Practice hovering motionless. This is the single most important skill for an underwater photographer.
B. Get Close (But Not Too Close!): Fill the Frame
- Why it works: Water absorbs light and clarity. The closer you are to your subject, the less water column there is between you and it, resulting in sharper, more colorful images.
- Actionable Advice: Aim to be within an arm's length if possible (without disturbing marine life!). A wide-angle lens (like on a GoPro or with a wet lens) is great for large subjects; a macro wet lens is essential for tiny critters.
C. Respect Marine Life: Leave No Trace
- Ethics First: Never touch, chase, or harass marine animals for a photo. Period. Maintain a respectful distance.
- Actionable Advice: Be patient. Observe their natural behavior. Often, if you're calm and still, they will come to you or allow you to approach slowly.
D. Shoot Upwards: The Sun is Your Friend
- Why it works: Shooting with the sun behind you (or at your back) can flatten your subject. Shooting slightly upwards, with the sun illuminating your subject from above, creates dramatic light, beautiful blues, and often captures stunning sunbursts.
- Actionable Advice: Try to position yourself below and slightly in front of your subject.
E. Practice, Practice, Practice:
- Where to start: Begin in a pool to get comfortable with your camera and housing. Practice pressing buttons, checking settings, and getting used to the feel of the rig underwater.
- Don't be afraid to fail: My first 1000 photos were probably terrible. That's okay! Learn from each shot. Review your photos after every dive. What worked? What didn't?
F. Post-Processing: The Final Polish
- Why it's important: Even the best underwater photos benefit from a little post-processing. Color correction, adjusting contrast, sharpening, and cropping can turn a good photo into a great one.
- Beginner Tools: Start with free or affordable options like Adobe Lightroom Mobile (it has excellent color correction tools, including a dehaze slider that works wonders for underwater shots), Snapseed, or GIMP.
- Actionable Advice: Focus on white balance (getting the colors right), exposure, and contrast. Don't over-edit! The goal is to restore the natural beauty you saw, not create something artificial.
4. Budgeting for Your Underwater Photography Adventure
So, how much will this set you back? Here’s a rough breakdown for different beginner tiers:
- Tier 1: The Action Camera Enthusiast (Great for casual video & wide-angle stills)
- GoPro Hero 11/12 Black: $300 - $500
- GoPro Dive Housing (if diving deep): $50 - $70
- Red Filter: $30 - $60
- Small tray/grip (optional but recommended): $40 - $80
- Total Estimated Cost: $420 - $710
- Tier 2: The Compact Camera Stills Shooter (Excellent for improved image quality & more control)
- Canon G7X Mark III or Sony RX100 VII: $700 - $1000
- Underwater Housing (Fantasea, Ikelite): $300 - $600
- Red Filter: $50 - $100
- Tray with Dual Handles: $70 - $150
- Small Video Light (1000-3000 lumens): $150 - $400
- Total Estimated Cost: $1270 - $2250
- Where to Save: Look for used gear (especially cameras, but be cautious with housings), rent gear for a trip before buying, or start with just the camera and housing, adding lights and filters later.
- Where to Splurge (wisely): Don't skimp on the housing for your compact camera – a leak-proof housing is non-negotiable. Also, a good quality red filter makes a huge difference.
5. My Personal Journey & Why It's Worth It
I remember my first time diving in Raja Ampat, Indonesia. The sheer biodiversity was overwhelming. I had my compact camera, a video light, and a wide-angle wet lens. I spent an entire dive patiently waiting for a school of barracudas to swirl around me, and when they did, I was ready. The resulting photos, vibrant and teeming with life, are still some of my favorites. They transport me back to that moment, that feeling of being completely immersed in the ocean's grandeur.
It’s not just about the "money shot" though. Underwater photography has made me a better diver. I'm more mindful of my buoyancy, more observant of marine life, and more appreciative of the delicate ecosystems we get to visit. It’s given me a deeper connection to the ocean and a powerful way to advocate for its protection. Every share on Instagram, every photo I show to a friend, is a tiny step towards inspiring others to care about our blue planet.
Ready to Dive In? Your Underwater Adventure Awaits!
The world beneath the waves is waiting to be explored, documented, and shared. You don't need to be a pro to capture its magic; you just need the right starting gear and a willingness to learn. From the vibrant coral gardens of the Great Barrier Reef to the mysterious wrecks of Coron Bay, your camera will become your third eye, allowing you to bring home stories that truly blow minds.
So, what are you waiting for? Grab your gear, check your O-rings, and take the plunge. The ocean's masterpieces are calling.
What's your dream underwater shot? Share your aspirations or first underwater photography experiences in the comments below! And don't forget to share this guide with your dive buddies!
---