Secret Bites & Killer Shots: How to Photograph Food Like a Pro Before They Become Mainstream
I remember it like it was yesterday: a tiny, unassuming stall tucked away down a labyrinthine alley in Marrakech’s old medina. The air was thick with the scent of spices, mint tea, and something utterly divine simmering in a clay tagine. I’d spent the day dodging motorbikes and bargaining for rugs, and now, here it was – a plate of tanjia, a slow-cooked lamb specialty, served simply with crusty bread. It looked incredible, the meat falling off the bone, shimmering with rich juices.
My first instinct? Whip out my phone, snap a quick pic, and dive in. The result? A blurry, poorly lit, beige blob that did absolutely no justice to the culinary masterpiece before me. I sighed, ate it all (because, tanjia), and vowed right then and there: never again would a truly authentic, mind-blowing dish go undocumented in its full, glorious potential.
That moment wasn't just about a bad photo; it was about a missed opportunity to share a story, to capture a fleeting, authentic experience that most tourists would never even know existed. In a world saturated with perfectly curated, often recycled, "viral" food photos, the real magic lies in discovering and immortalizing those hidden culinary gems before they hit the mainstream. This isn’t just about photography; it’s about being a culinary explorer, a visual storyteller, and a pioneer of taste.
So, how do you capture that steaming bowl of pho from a family-run Hanoi eatery, or that vibrant ceviche from a beachfront shack in Peru, or that sizzling sfenj (Moroccan doughnut) from a bustling souk, in a way that truly makes your followers stop scrolling and feel the flavor? Let's dive in.
1. The Quest for the Undiscovered Bite: Your Culinary Compass
Before you can photograph food like a pro, you need to find the food that deserves to be photographed. Forget the Instagram hotspots; we're hunting for authenticity.
Your Action Plan:
- Go Local, Go Deep: Start by asking. Not just your hotel concierge, but the barista at your morning coffee spot, the vendor at the fruit market, your Airbnb host, or even a friendly taxi driver. They know the real deal. In Lisbon, my hostel owner pointed me to a tiny bakery serving pastel de nata that was so good, it put the famous Belém factory to shame – and had a fraction of the queue.
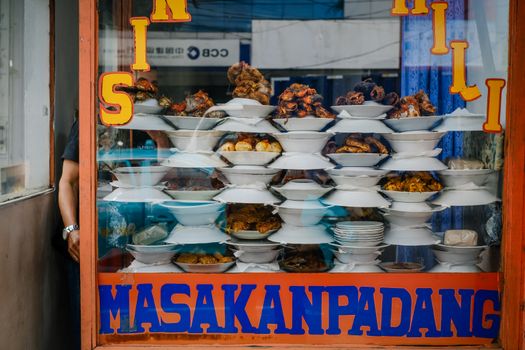
- Wander with Purpose (and No Purpose): Sometimes the best finds are accidental. Ditch Google Maps for a few hours and just walk. Follow your nose, listen for the buzz of local chatter, or look for long lines of locals. That’s how I stumbled upon an incredible khao soi stand in Chiang Mai, tucked behind a temple, where a bowl cost me about 40 baht (just over $1 USD) and tasted like heaven.
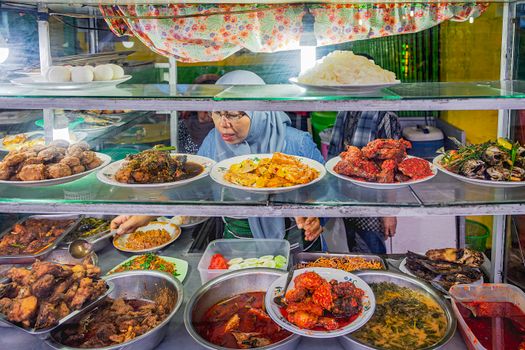
- Embrace the Markets: Wet markets, farmers' markets, night markets – these are goldmines. Not only do they offer incredible photo opportunities of fresh produce and bustling life, but they often have food stalls serving incredibly fresh, seasonal dishes that haven’t been gentrified for tourists. Think about the vibrant colors of a spice market in Istanbul, or the endless variety of street food at Shilin Night Market in Taipei.
- Offline Research is Key: Before you even leave, scour lesser-known food blogs, local newspapers (translated!), or even academic papers on regional cuisine. Look for dishes that are specific to a particular region or season. This is how I found out about khachapuri adjaruli in Georgia – a boat-shaped bread filled with cheese, butter, and an egg – a dish that’s famous locally but still relatively under-the-radar globally.
Pro Tip: Don’t be afraid to try places that look a little rough around the edges. Often, these are where the true culinary magic happens. Just observe local hygiene practices – if locals are eating there en masse, it's usually a good sign!
2. Light: Your Secret Ingredient (and it's Free!)
Forget expensive gear; natural light is your best friend in food photography. It’s the single most important factor in making your food look appetizing, and it’s always available (unless you’re eating in a dungeon, which, sometimes, is part of the charm!).
Your Action Plan:
- Seek Out the Window Seat: Always, always try to sit near a window or an open doorway. Natural, diffused light is soft, even, and brings out the texture and colors of your food. Avoid direct, harsh sunlight, which creates unflattering shadows.
- Embrace the Golden Hour (Indoors!): The soft, warm light of early morning or late afternoon isn't just for landscapes. If you're dining during these times, pay attention to how the light falls into the restaurant. It can create beautiful, inviting tones.
- Work with Overhead Light (Carefully): If you're indoors with only overhead lighting, position your dish slightly off-center to avoid harsh shadows directly under the food. Sometimes, using a menu or even your hand to subtly block a direct spotlight can diffuse the light enough.
- Use a Diffuser (DIY Style): Don't have a professional diffuser? A white napkin, a piece of paper, or even a white shirt can be held up to bounce light onto your dish or soften harsh shadows. I’ve definitely used a spare menu as a makeshift reflector in a dimly lit trattoria in Rome.
- Avoid Flash at All Costs: Seriously, just don't. On-camera flash flattens your food, washes out colors, and creates harsh, unappealing reflections. If it's too dark, embrace the moodiness or wait for better light.
Personal Anecdote: In a tiny ramen shop in Tokyo, I was seated at a counter with no natural light. I noticed a small, beautifully diffused lamp hanging directly above my bowl. Instead of fighting it, I used the single, soft light source to my advantage, shooting directly down to capture the steam rising and the glistening broth, creating a dramatic, intimate shot that felt incredibly authentic to the cozy setting.
3. Composition: Framing the Flavor Story
Composition is how you arrange the elements in your shot to tell a visual story. It's what draws the viewer's eye and makes them salivate.
Your Action Plan:
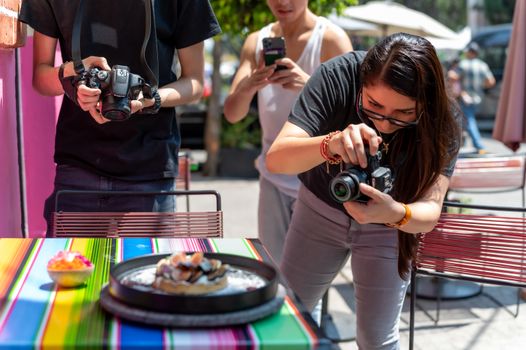
- The Overhead Shot (Flat Lay): This is a classic for a reason, especially for dishes with interesting patterns, multiple components, or when you want to show the whole table spread. It works great for a colorful array of tapas in Barcelona, or a breakfast spread in Bali. Ensure you're shooting directly above, parallel to the table, to avoid distortion.
- The 45-Degree Angle (Eye-Level): This is often the most natural and inviting angle, mimicking how you'd see the food when it's placed in front of you. It's perfect for showing off height, layers (like a towering burger or a layered cake), or the steam rising from a hot dish.
- The Close-Up (Detail Shot): Don't be afraid to get in tight! Focus on texture, glistening sauces, or a specific ingredient. A close-up of the flaky crust of a burek in Sarajevo or the perfect char on a grilled skewer can be incredibly powerful.
- Rule of Thirds: Imagine your frame divided into nine equal squares by two horizontal and two vertical lines. Place your main subject (or key elements) along these lines or at their intersections for a more dynamic and engaging composition.
- Negative Space: Don't feel the need to fill every inch of the frame. Empty space around your subject can help it stand out, giving the eye a place to rest and emphasizing the beauty of the dish.
- Leading Lines: Use elements like cutlery, table edges, or even the lines of the plate to draw the viewer's eye towards your main subject.
Pro Tip: Take multiple shots from different angles. What looks good in person might not translate as well through the lens. Experiment!
4. Styling & Props: Authenticity Over Artifice
When shooting "before they become mainstream," the key is authenticity. You're not aiming for a sterile studio shot; you're capturing a moment in time and place.
Your Action Plan:
- Embrace the Environment: The best props are often already there. The rustic wooden table of a taverna in Greece, the patterned tile of a cafe in Seville, the colorful plastic stools of a street food stall in Vietnam – these elements add context and tell a story. Don’t move the salt shaker if it feels natural to the scene.
- Local Textiles & Textures: A simple napkin, a woven placemat, or even the fabric of a local's clothing in the background can add texture and a sense of place. In Oaxaca, a vibrant embroidered tablecloth elevated a simple shot of tlayudas (crispy tortillas).
- Hands-On (Literally): Including a hand reaching for a piece of bread, pouring a drink, or holding a utensil can add a human element and a sense of engagement. It makes the photo more relatable and inviting. Just make sure the hands are clean and well-manicured (or authentically rugged, depending on the vibe!).
- Ingredient Storytelling: If there are fresh ingredients nearby – herbs, spices, a basket of fruit – incorporate them subtly into the background or foreground. This hints at the freshness and quality of the dish.
- Don't Over-Stage: The goal is to make it look effortless, not contrived. A few crumbs, a slightly messy napkin, or a perfectly imperfect drizzle can actually make the photo more appealing and real. Resist the urge to meticulously arrange every single grain of rice.
Personal Anecdote: In a tiny, bustling izakaya in Kyoto, I ordered yakitori. The skewers arrived sizzling, fresh off the grill. Instead of clearing the table, I embraced the chaotic beauty: the condensation on my beer glass, the worn wooden counter, the blur of other diners in the background. It wasn't "perfectly styled," but it screamed "authentic Japanese experience," and that's what made the photo powerful.
5. Beyond the DSLR: Mobile Food Photography Magic
You don't need a fancy camera to take incredible food photos. Modern smartphones are incredibly capable, and often, their discreet nature makes them perfect for capturing candid moments in busy local eateries.
Your Action Plan:
- Clean Your Lens: This is so basic, yet so often overlooked! A smudged lens is the enemy of a crisp photo. Give it a quick wipe with a soft cloth.
- Use Portrait Mode (Wisely): Many phones have a portrait mode that creates a beautiful depth of field, blurring the background and making your food pop. Use it, but don't overdo the blur – you still want some context.
- Tap to Focus & Adjust Exposure: On most phones, tapping on the screen will focus on that point. After tapping, a sun icon or slider usually appears, allowing you to manually adjust the brightness (exposure). This is crucial for getting the light just right.
- Third-Party Camera Apps: Apps like Halide (iOS) or ProShot (Android) give you more manual control over settings like ISO and shutter speed, mimicking a DSLR experience.
- Stability is Key: Even with a phone, shaky hands lead to blurry photos. Prop your phone against something, or brace your elbows on the table.
- Burst Mode for Action: Capturing steam, a drizzle of sauce, or someone taking the first bite? Use burst mode (hold down the shutter button) to get a sequence of shots and pick the best one.
Pro Tip: Don't zoom digitally with your phone. It degrades image quality. Instead, physically move closer to your subject. If you can't get closer, you're better off cropping later in editing.
6. The Editing Touch: Enhancing, Not Overdoing
Editing is where you polish your masterpiece, but the goal for authentic food photography is enhancement, not transformation. You want the dish to look like its best self, not an entirely different dish.
Your Action Plan:
- Start with the Basics: Crop to improve composition, straighten horizons (especially for flat lays), and adjust brightness/contrast.
- White Balance: This is critical. Food often looks its best with accurate colors. If your photo looks too yellow (warm) or too blue (cool), adjust the white balance to make the whites truly white. Most editing apps have a white balance slider or an eyedropper tool.
- Boost Colors (Subtly): Increase saturation or vibrance just enough to make colors pop without making them look artificial. Think about the vibrant reds of a chili sauce or the fresh green of herbs.
- Sharpening & Clarity: A little sharpening can make textures stand out. Clarity can add definition, but use sparingly – too much can make food look gritty or fake.
- Highlights & Shadows: Recover details in blown-out highlights or dark shadows to add depth.
- Popular Mobile Editing Apps:
- Lightroom Mobile: Powerful, professional-grade tools, great for precise adjustments.
- Snapseed: User-friendly, excellent for selective adjustments and quick fixes.
- VSCO: Known for its beautiful filters that can give a consistent aesthetic.
Personal Anecdote: I once photographed a vibrant fruit salad in Bali. The natural light was perfect, but the colors felt a little muted. A quick adjustment in Lightroom Mobile – boosting the 'orange' and 'red' hues just slightly, and adding a touch of vibrance – made the mangoes, papayas, and dragon fruit truly sing, without looking artificial. It felt like I was just revealing the true colors that were already there.
7. Storytelling: More Than Just a Dish
The most impactful food photos do more than just show a dish; they tell a story. They transport the viewer to that moment, that place, that feeling.
Your Action Plan:
- Capture the Context: Don't just focus on the plate. Include elements of the surroundings – the bustling street, the chef preparing the food, the smiling vendor, the unique decor of the restaurant. This adds layers to your narrative.
- The Human Element: People make food alive. A shot of the chef proudly presenting their dish, a local enjoying their meal, or even just your travel companion's delighted reaction can elevate your photo.
- Before & After: Sometimes, capturing the raw ingredients before they're cooked, and then the finished dish, tells a compelling story of transformation. Think about the fresh fish at the market, then the perfectly grilled fish on your plate.
- The "Action" Shot: A spoon digging into a rich curry, steam rising from a hot beverage, a sprinkle of garnish – these dynamic moments add life and appeal.
- Pair with a Captivating Caption: Your photo is the hook, but your caption is the story. Share the name of the dish, where you found it, a little about its history, the flavors, and why it was special. This is where you truly bring the "before mainstream" aspect to life. Mention the specific stall name, the price, the feeling of discovery.
Example Caption Idea: "Forget the guides, this is the real deal! Tucked away in a tiny alley in [City], I stumbled upon [Dish Name] at [Stall Name/Location]. For just [Price], this [describe dish, e.g., slow-cooked lamb in a clay pot] was an absolute revelation. The rich, earthy flavors, the tender meat falling off the bone… a true taste of [Culture/Region] that hasn't made it to the tourist maps (yet!). If you're ever in [City], promise me you'll seek this out! #HiddenGems #AuthenticEats #FoodDiscovery #TravelFood #BeforeItGoesViral"
Conclusion: Your Culinary Camera Awaits!
The journey to photographing food like a pro, especially those undiscovered, authentic bites, is an incredibly rewarding one. It transforms you from a passive eater into an active explorer, a visual storyteller, and a curator of unique culinary experiences. It's about more than just pretty pictures; it's about preserving moments, celebrating cultures, and sharing the true essence of travel through its most delicious medium.
So, next time you're on the road, put down the tourist map, follow your nose, engage with locals, and keep your camera (or phone!) ready. Seek out those tiny, unassuming stalls, those family-run eateries, and those dishes that whisper tales of tradition and passion. Capture them with light, composition, and a genuine appreciation for the story they tell.
Then, share your discoveries! Tag us @Tripsora and use the hashtag #TripsoraFoodFinds. We can't wait to see what incredible, mainstream-defying culinary masterpieces you uncover and immortalize. Your next viral-before-it-was-viral food shot is just around the corner!
---