The Unforgettable Dance: My First Aurora Encounter (and How I Almost Missed the Shot)
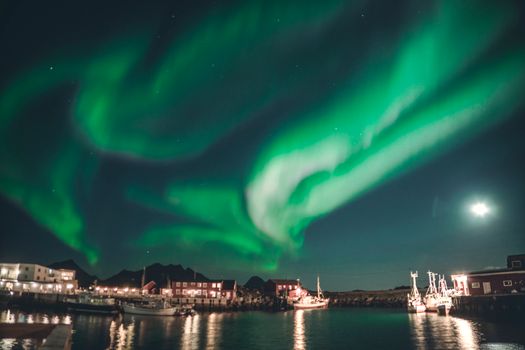
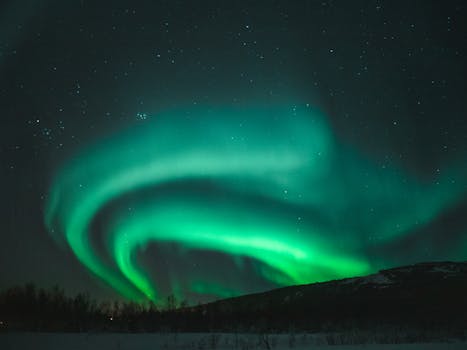
The world went silent the moment I saw it. A faint, shimmering green ribbon unfurling across the inky blackness above the Norwegian fjords. It was barely a whisper at first, a shy curtain drawn across the cosmos. Then, as if a celestial conductor had raised their baton, it began to dance. Waves of emerald and violet pulsed, swirled, and stretched, painting the sky with an otherworldly ballet. My heart pounded, a frantic drumbeat against the crisp Arctic air.
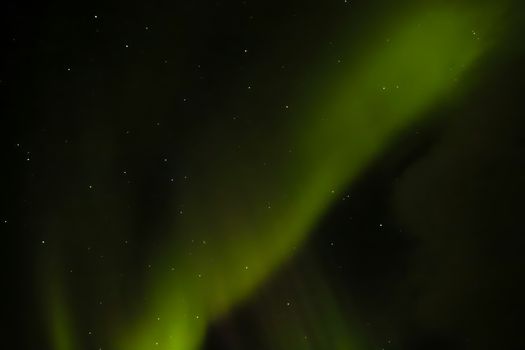
I fumbled with my camera, fingers stiff with cold, my mind racing. I’d read all the guides, watched all the tutorials, but nothing prepares you for the sheer, overwhelming majesty of the Aurora Borealis. I snapped a shot, then another, only to find a blurry, dark mess on my screen. Panic flared. Was this once-in-a-lifetime moment going to be lost to bad settings and frozen fingers?
That night, I vowed never again. I spent the rest of my trip obsessively refining my technique, learning from mistakes, and talking to seasoned aurora hunters. What I discovered wasn't just a set of camera settings, but an entire mindset – a blend of meticulous preparation, technical know-how, and a dash of pure, unadulterated passion. And now, I'm sharing it with you. Because the Northern Lights are gaining popularity, and if you want to capture them in a truly unique, breathtaking way, before every influencer and their dog has the same shot, the time to master it is now.
This isn't just about taking a picture; it's about telling a story, capturing the soul of the aurora, and creating images that will make your friends gasp. Ready to become an aurora photography legend? Let's dive in.
1. The Aurora Hunter's Arsenal: Gear Up Like a Pro (and Why Warmth is Your Best Friend)
Before you even think about camera settings, let's talk about what you need to bring. Chasing the aurora means battling the elements, often in remote, freezing locations. Your gear needs to be up to the task, and so do you.
The Essentials:
- Camera Body: A full-frame DSLR or mirrorless camera is ideal due to its superior low-light performance and dynamic range. Models like the Sony a7S series, Canon EOS R6/R5, or Nikon Z6/Z7 excel here. Don't despair if you have a crop sensor camera (like a Canon Rebel or Nikon D3500); it's still absolutely possible, you'll just need to push your ISO a bit more and be mindful of noise.
- Wide-Angle, Fast Lens: This is arguably the most crucial piece of equipment. You need a lens with a wide aperture (f/2.8 or wider) to let in as much light as possible, and a wide focal length (14mm-24mm on full-frame, or equivalent on crop sensor) to capture the vastness of the sky. My go-to is often a 14-24mm f/2.8.
- Sturdy Tripod: Non-negotiable. You'll be taking long-exposure shots, so any camera shake will ruin your image. Invest in a solid, stable tripod that can withstand wind. My personal choice is a carbon fiber one – lighter for travel, but still incredibly sturdy.
- Remote Shutter Release/Intervalometer: Pressing the shutter button directly can cause camera shake. A remote release (wired or wireless) or using your camera's 2-second timer is a must. An intervalometer is fantastic for time-lapses.
- Extra Batteries (Lots of Them!): Cold drains batteries at an alarming rate. I always carry at least 3-4 fully charged spares, kept warm in an inside pocket until needed.
- Headlamp with Red Light Mode: Essential for seeing what you're doing without ruining your night vision or affecting others' shots. The red light won't blow out your camera's long exposure.
- Warm Clothes: Layers, thermal underwear, a heavy-duty insulated jacket, waterproof outer shell, insulated boots, thick gloves, and a hat are paramount. Frostbite is a real risk. I once saw a fellow photographer nearly lose a finger in Lofoten because he underestimated the wind chill. Don't be that person.
- Hand Warmers: Stick them in your gloves, boots, and even around your spare batteries to keep them from freezing.
- Lens Cloths: For condensation or snowflakes.
Planning Your Hunt:
- Aurora Forecast Apps: Download "My Aurora Forecast & Alerts" or "SpaceWeatherLive." These apps provide real-time Kp index (a measure of geomagnetic activity, 3+ is good, 5+ is spectacular!), solar wind data, and local cloud cover.
- Moon Phase: A new moon (or no moon) offers the darkest skies and brightest aurora. A full moon can be beautiful, illuminating the landscape, but it will diminish the aurora's intensity.
- Location Scouting: Use Google Maps satellite view during the day to find open areas with interesting foregrounds, away from city lights.
- Local Knowledge: Talk to locals, tour guides, or even other photographers. They often know the best spots and recent aurora activity.
2. Decoding the Light: Mastering Your Camera Settings (Beyond Auto-Mode)
This is where the magic happens. Forget auto mode; the aurora demands manual control.
- Manual Mode (M): You need full control over aperture, shutter speed, and ISO.
- Focus – Manual to Infinity: Auto-focus will hunt endlessly in the dark. Switch your lens to manual focus. Find a bright star, zoom in on it in your camera's live view, and carefully adjust focus until the star is a tiny pinprick. Once set, do not touch your focus ring. Some lenses have an infinity mark, but it's often not truly accurate, so always manually focus.
- Aperture – Wide Open: Set your lens to its widest aperture (smallest f-number), typically f/2.8 or f/4. This allows maximum light into the sensor.
- ISO – Find Your Sweet Spot: Start with ISO 1600 or 3200. If the aurora is faint, you might go higher (6400). If it's incredibly bright and fast-moving, you might go lower (800-1600). Higher ISO increases noise, so find the lowest setting that gives you a well-exposed image. My first mistake was cranking ISO too high and getting a grainy mess.
- Shutter Speed – The Dance of Light: This is the most variable setting.
- Faint, Slow Aurora: 15-25 seconds. This allows enough light to accumulate, making the faint aurora visible.
- Bright, Dancing Aurora: 5-10 seconds. If the aurora is moving quickly, a shorter shutter speed will freeze its shape and prevent it from blurring into a green blob. My most dynamic shots came when I dared to shorten my shutter speed.
- Stars: Be aware that anything longer than 20-25 seconds can start to show star trails, especially with wider lenses. If pin-sharp stars are crucial, aim for shorter exposures.
- White Balance – Kelvin is King: Auto white balance can be inconsistent. Set your white balance to Kelvin and start around 3500K-4500K. This often gives a natural, cool tone to the aurora and a clear sky. You can also experiment with "Tungsten" or "Fluorescent" presets. Always shoot in RAW so you can fine-tune this later without losing data.
- Shoot RAW: This gives you maximum flexibility in post-processing to adjust exposure, white balance, and pull out details without degrading image quality. It's non-negotiable for professional-looking aurora shots.
3. Beyond the Lights: Crafting a Captivating Composition & Telling a Story
A picture of just the aurora, no matter how vibrant, can sometimes feel flat. The best aurora photos tell a story, grounding the celestial spectacle with an earthly element. This is where your unique vision comes in.
- Foreground Interest: This is critical. Look for compelling elements in the foreground: snow-covered trees, majestic mountains, frozen lakes, a lone cabin, a fishing boat, or even ice formations. These elements provide scale, depth, and a sense of place. My favorite shots from Iceland often feature the aurora reflected in the glassy surface of Jökulsárlón glacier lagoon, with icebergs providing a stunning foreground.
- The Human Element: Adding a silhouette of a person gazing up at the sky adds a powerful sense of wonder and scale. It makes the viewer imagine themselves in that moment. You can even light-paint a tent or a small structure for an intimate, warm glow.
- Leading Lines: Use natural lines in the landscape (a road, a river, a line of trees) to draw the viewer's eye from the foreground up to the aurora.
- Reflections: Still water or fresh ice can create incredible reflections, doubling the magic. This is why spots like Jökulsárlón or calm fjords in Norway are so popular.
- Rule of Thirds: Position the aurora or your foreground elements along the grid lines or at their intersections for a more balanced and dynamic composition.
- Perspective: Get low, get high, try different angles. Don't be afraid to experiment. One of my most shared photos was taken lying flat on the ice, capturing the aurora arching directly overhead with a tiny corner of my tripod visible, giving a sense of the vastness.
4. The Art of the Chase: Advanced Techniques & Troubleshooting in the Field
Even with perfect settings, aurora hunting throws curveballs. Here's how to elevate your game and overcome common challenges.
- Light Painting (Subtly): To illuminate a dark foreground, use a flashlight on a low setting. During your exposure, briefly "paint" the foreground with the light. Practice makes perfect – too much light will blow out the foreground. Aim for a soft, natural glow. I learned this trick from a local guide in Finland who made a simple snowdrift look like a sculpture.
- Focus Stacking (Advanced): If you want a perfectly sharp foreground and sharp stars/aurora, you might consider focus stacking. Take one shot focused on the foreground and another focused on infinity for the sky, then blend them in post-processing. This is for the truly dedicated!
- Dealing with Light Pollution: Always try to get as far away from cities as possible. If you can't, position yourself so the city lights are behind you or off to the side, not directly in your frame. Elevated spots can help rise above ground-level light.
- Battling the Clouds: This is the aurora hunter's nemesis.
- Patience: Clouds often move. Wait it out if you can.
- Check Forecasts Constantly: Use multiple weather apps.
- Relocate: If one area is completely socked in, sometimes driving 30-60 minutes in a different direction can put you under clear skies. This often means having a rental car.
- Keeping Gear Warm & Dry: When moving from cold outdoors to warm indoors, condensation can form on your lens and camera, potentially causing damage. Place your camera in a sealed plastic bag before going inside, allowing it to warm up slowly. Use silica gel packets in your camera bag.
- Aurora Portraits: If you want to include a person clearly in the shot (not just a silhouette), it's trickier. You'll need a shorter exposure (e.g., 3-5 seconds), higher ISO, and potentially a subtle burst of external flash (on a very low setting) or a strong LED light to illuminate the person for a fraction of a second during the exposure. This requires coordination!
5. Your Aurora Playground: Unveiling Prime Locations (and Finding Your Own Secret Spots)
The Northern Lights are visible in the "aurora oval," a ring around the magnetic poles. While many places offer views, some stand out for their accessibility, stunning landscapes, and dark skies.
- Iceland: A photographer's dream.
- Locations: Jökulsárlón Glacier Lagoon (icebergs, reflections), Snaefellsnes Peninsula (Kirkjufell mountain), Golden Circle region (away from Reykjavik's light pollution).
- Details: Easily self-drive. Winter (Sept-April) is best. Tours range from $70-$150. Accommodation can be $100-$300+ per night.
- My Experience: The sheer diversity of landscapes makes Iceland incredible. One night, I chased the aurora from a black sand beach to a waterfall, each setting providing a unique foreground.
- Norway: Dramatic fjords and coastline.
- Locations: Lofoten Islands (picturesque fishing villages, mountains, beaches), Tromsø (larger city, but with good access to dark areas, many tours start here).
- Details: Lofoten requires more driving, but the scenery is unparalleled. Tromsø offers more organized tours ($100-$250). Flights to Tromsø can be pricey.
- My Experience: Lofoten was magical. The red Rorbu cabins nestled against snow-capped peaks with the aurora overhead felt like a postcard come to life.
- Finland (Lapland): Fairytale forests and glass igloos.
- Locations: Rovaniemi (Santa's official home), Levi, Saariselkä.
- Details: Famous for glass igloos, allowing you to watch from bed (though photography from inside can be tricky due to reflections). Excellent for winter activities.
- My Experience: Staying in a glass igloo near Levi was a surreal experience. Waking up to a faint aurora still dancing was unforgettable, even if the best shots were from outside.
- Sweden (Abisko): Known for clear skies.
- Locations: Abisko National Park, Kiruna.
- Details: Abisko is renowned for its "Blue Hole," a patch of sky that often remains clear even when surrounding areas are cloudy. Offers the Aurora Sky Station.
- My Experience: The crisp, dry air in Abisko often means incredibly clear skies, making it a reliable spot for aurora viewing.
- Canada (Yukon, NWT): Wilderness and vastness.
- Locations: Whitehorse (Yukon), Yellowknife (Northwest Territories).
- Details: Offers a true wilderness experience. Can be extremely cold. Many specialized aurora lodges and tours.
- My Experience: The vast, untouched landscapes of the Yukon provide a stark, beautiful contrast to the aurora. It feels truly remote and wild.
- Alaska (Fairbanks): High probability.
- Locations: Fairbanks and surrounding areas.
- Details: Fairbanks is directly under the aurora oval, offering excellent chances.
- My Experience: Fairbanks surprised me with its accessibility and consistent aurora activity.
Finding Your Own Secret Spot:
Don't just go where everyone else goes. Rent a car, consult dark sky maps (like lightpollutionmap.info), and drive away from any town. Look for open areas with interesting foregrounds – a lone tree, a frozen river, a unique rock formation. Sometimes the best shots are found just off a quiet road, far from any tour bus. This is how you get those "before they become mainstream" shots – by seeking out the unique. Keep in mind that costs for flights, accommodation, and tours vary wildly depending on the season and location, but expect to invest anywhere from $2,000 to $5,000+ for a dedicated aurora hunting trip. It's an investment in an experience, and photos, that money can't truly buy.
6. Post-Processing Polish: Bringing Your Photos to Life (Without Overdoing It)
Shooting RAW is only half the battle. Post-processing is where you refine your image, bringing out the colors and details that your camera sensor captured. The goal is to enhance, not to create something artificial.
- Software: Adobe Lightroom Classic or Photoshop are industry standards. Free alternatives include Darktable or GIMP.
- Basic Adjustments First:
- Exposure: Adjust slightly if your image is too dark or bright.
- Contrast: Add a touch to make the aurora pop.
- Highlights/Shadows: Recover detail in blown-out highlights or deep shadows.
- White Balance: Fine-tune the Kelvin temperature and tint to get natural-looking colors. Don't be afraid to experiment to bring out the subtle purples and reds.
- Noise Reduction: Long exposures at high ISO often introduce noise. Apply noise reduction carefully – too much can make your image look plasticky. Start with luminance noise reduction.
- Clarity & Dehaze: A small bump in clarity can define the aurora's structure. Dehaze can help cut through any atmospheric haze.
- Vibrance & Saturation: Use these sparingly. A slight increase in vibrance can make colors richer without looking artificial. Avoid over-saturating the greens.
- Sharpening: Apply a final touch of sharpening to bring out the detail in the aurora and foreground.
- Cropping & Straightening: Ensure your horizon is straight and crop to improve composition.
Remember, the goal is to reflect the magic you witnessed, not to invent it. A subtle hand in post-processing will yield the most authentic and breathtaking results.
The Time is NOW: Chase the Untamed Light
The Northern Lights are a phenomenon that transcends mere photography; they're an experience that touches the soul. But in an increasingly crowded world, capturing these moments in a truly unique way requires preparation, skill, and a dash of adventurous spirit.
The secret to photographing the Northern Lights "before they become mainstream" isn't just about finding an unknown location (though that helps!). It's about mastering the craft, understanding the nuances of light and composition, and approaching the experience with respect and intention. It's about creating images that stand out, not just because of the subject, but because of the story they tell and the skill with which they were captured.
So, what are you waiting for? The Arctic wilderness is calling. Grab your gear, book that flight, and prepare to witness and immortalize one of nature's greatest spectacles. Don't just see the aurora; capture its untamed beauty and share your incredible journey with the world. Your ultimate aurora photography adventure starts now.
---