Unlock Hidden Views: Time-Lapse Secrets Locals Keep from Tourists
There I was, perched precariously on a fire escape in the heart of Rome, the morning mist still clinging to the ancient rooftops. Below, the city was slowly stirring – scooters buzzing to life, bakeries releasing the scent of fresh bread, and the first rays of sun painting the terracotta tiles in gold. My camera, an old trusty DSLR, was silently clicking away, capturing a frame every few seconds. For over an hour, I watched, mesmerized, as the city woke up, transforming from a sleepy silhouette into a vibrant tableau.
Later, back in my hostel, I stitched those hundreds of individual photos together. The result? A breathtaking 30-second video clip where the dawn exploded over the Eternal City, clouds raced across the sky like galloping horses, and the bustling streets below became a river of life. It wasn't the Colosseum at sunset, or the Trevi Fountain at noon – it was my Rome, a secret moment I’d found, a perspective only a few would ever witness. And that, my friends, is the magic of time-lapse while traveling, especially when you learn to find those spots locals might just want to keep for themselves.
We’ve all seen the iconic travel photos – the Eiffel Tower, Machu Picchu, the Grand Canyon. They’re stunning, of course, but after a while, they all start to look a bit… similar. What if you could capture the essence of a place, the way it breathes, moves, and changes over time, from a vantage point no one else has? That’s where time-lapse comes in. It’s not just about taking pictures; it's about storytelling, revealing the hidden rhythms of a destination. And trust me, once you start, you’ll never look at travel the same way again.
Ready to dive into the art of capturing the world in motion, uncovering those unique perspectives that will make your travel videos truly unforgettable? Let's go!
The "Why" – Beyond the Selfie: Why Time-Lapse is Your New Travel Obsession
Forget the perfectly posed selfie or the quick video clip. Time-lapse photography elevates your travel storytelling to a whole new level. It compresses hours, days, or even weeks into mere seconds, revealing patterns, movements, and transformations that are invisible to the naked eye.
Imagine capturing:
- A bustling market coming to life: From empty stalls to a vibrant explosion of color and activity.
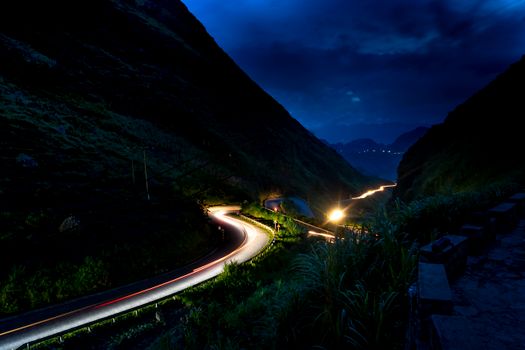
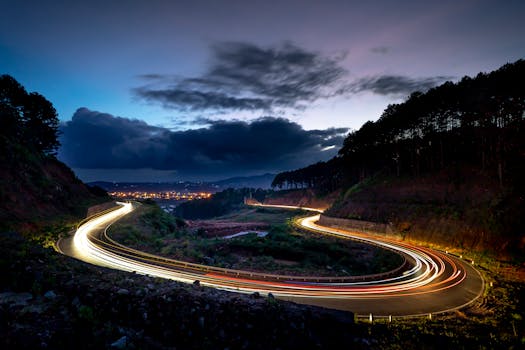
- The relentless flow of urban traffic: A mesmerizing dance of headlights and tail lights.
- A dramatic mountain weather system: Clouds rolling in and out, mist swirling, revealing and concealing peaks.
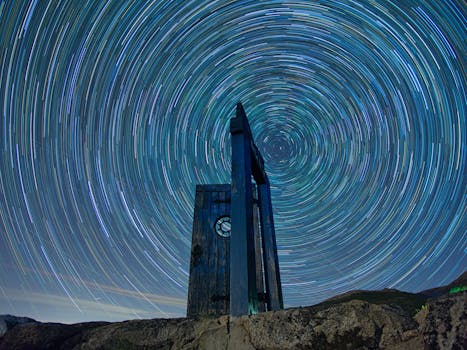
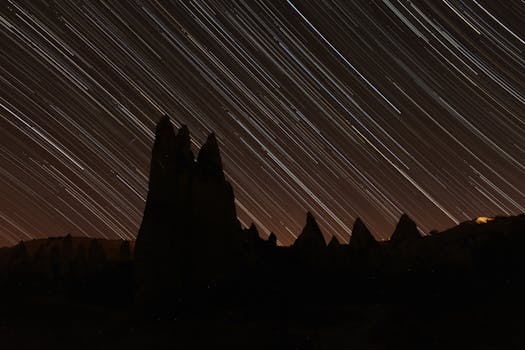
- The celestial ballet of stars: Tracing arcs across the night sky above an ancient ruin.
- Sunrises and sunsets: Not just a static image, but the full, glorious transition of light and color.
These aren't just pretty videos; they're emotional experiences. They capture the soul of a place, the unseen forces at play, the relentless march of time. And when you find a unique spot to capture it from – a quiet alleyway, a forgotten rooftop, a less-trodden path – you're not just a tourist; you're an explorer, a visual anthropologist, revealing something truly special.
Gearing Up Like a Pro (Without Breaking the Bank)
You don't need a Hollywood budget to create stunning time-lapses. While professional gear helps, many incredible sequences are shot with surprisingly accessible equipment.
1. The Camera:
- DSLR or Mirrorless Camera: This is your best bet for high-quality, flexible time-lapses. Look for models with manual controls (essential!) and good low-light performance. Brands like Sony (A7 series), Canon (Rebel series, 5D), Nikon (D3XXX, D5XXX, D7XXX series), and Fujifilm are excellent. My trusty Canon EOS 80D, bought second-hand for about $600, has been a workhorse.
- Smartphone: Modern smartphones (iPhone 13+, Google Pixel 6+, Samsung Galaxy S22+) have increasingly capable time-lapse modes built-in. While less flexible than a dedicated camera, they are incredibly convenient for quick, spontaneous captures. Apps like Lapse It or Hyperlapse from Instagram can add more control.
- GoPro: Fantastic for rugged environments, unique angles, and hands-free shooting. Their built-in time-lapse modes are surprisingly good, especially for action and wide-angle shots.
2. The Tripod – Your Unsung Hero: This is non-negotiable. A sturdy tripod keeps your camera perfectly still, which is paramount for smooth time-lapses.
- Travel Tripod: Look for something lightweight but stable. Carbon fiber tripods are excellent but pricier. Aluminum options are heavier but more affordable. I swear by my Manfrotto Befree Advanced, which folds down to a compact size and handles my camera and lens easily, usually retailing for around $150-200.
- Mini Tripod/GorillaPod: Great for smartphones or small cameras, allowing you to mount them on railings, branches, or uneven surfaces.
3. Intervalometer (External or Built-in): This device tells your camera to take a picture at set intervals.
- Built-in: Many modern DSLRs and mirrorless cameras have an intervalometer function in their menu. Check your camera manual!
- External: If your camera doesn't have one, you'll need an external remote intervalometer (often $20-50). Get one compatible with your camera model.
4. Power! Batteries & Power Banks: Time-lapses consume battery life rapidly.
- Extra Camera Batteries: Always carry at least two fully charged spares.
- USB Power Bank: For cameras that can be powered via USB (many mirrorless models) or for your smartphone, a high-capacity power bank (20,000 mAh+) is a lifesaver.
5. ND Filters (Neutral Density): These are like sunglasses for your camera lens, reducing the amount of light entering.
- Why? They allow you to use longer shutter speeds in bright conditions, creating motion blur for elements like water, clouds, or busy streets, which makes your time-lapse look incredibly smooth and cinematic. A variable ND filter (ND2-ND400) is a versatile choice, typically $30-100.
6. Slider (Optional, Advanced): A motorized slider adds subtle camera movement to your time-lapse, creating a dynamic, professional feel. Not essential for beginners, but a fantastic upgrade if you get serious. Expect to pay $200+ for a decent travel-friendly slider.
Unearthing the Untouched – Finding Your Secret Spots
This is where the "locals don't want tourists to know" really comes into play. It's not about trespassing or being disrespectful, but about looking beyond the postcard views and discovering perspectives that offer a fresh, authentic glimpse into a place.
1. Go Off-Peak, Way Off-Peak:
- Sunrise/Pre-Dawn: This is my absolute favorite time. Cities are quiet, light is magical, and you often have popular spots entirely to yourself. I once captured the sunrise over Prague's Charles Bridge with barely a soul in sight – a feat impossible just an hour later.
- Late Night: After the crowds dissipate, city lights create incredible patterns and moods. Think neon signs, car trails, and quiet historical streets.
- During Siesta/Lunch Breaks: In many Mediterranean or Latin American cultures, the midday heat brings a lull in activity. This can be a great time to capture the quiet side of a bustling town.
2. Talk to Actual Locals (Not Just Tourist Info):
- Befriend Hostel Staff/B&B Owners: They often have insider knowledge about unique viewpoints, quiet parks, or local hangouts.
- Engage with Shopkeepers/Baristas: Ask them where they go for a quiet moment, or what their favorite time of day is in a certain area.
- Learn a Few Local Phrases: A simple "Do you know any beautiful quiet spots for photography?" in the local language can open doors. In Kyoto, a friendly shop owner pointed me to a hidden garden behind his store, a serene spot perfect for capturing the changing light.
3. Dive into Obscure Online Resources:
- Local Photography Forums/Facebook Groups: Search for groups dedicated to photography in your destination. Members often share lesser-known spots.
- Niche Travel Blogs/Vlogs: Look for blogs that focus on "offbeat," "alternative," or "local experience" travel.
- Google Maps Satellite View: Seriously! Zoom in on dense urban areas. Look for public parks, elevated pedestrian walkways, bridges that offer unique angles, or even rooftop bars (with permission, of course!). I’ve found countless gems by just "flying" over a city on Google Maps.
4. Embrace the "Lost" Mentality:
- Wander Aimlessly: Sometimes the best spots are found by getting deliberately lost in a neighborhood. Look up, look down, look through arches, notice the light.
- Scout for Vantage Points: Always be on the lookout for elevated positions – hills, observation decks, historical towers, or even the upper floors of public car parks (again, check rules!). In Lisbon, I found an amazing view of the city's iconic trams winding through narrow streets from a lesser-known miradouro (viewpoint) that was far less crowded than the famous ones.
5. Consider the "Everyday" but from a New Angle:
- Markets: Capture the setup and takedown.
- Transportation Hubs: The ebb and flow of trains, buses, or ferries.
- Construction Sites: The slow, deliberate progress of building.
- Nature's Subtle Shifts: A flower blooming, a tide coming in, a specific tree changing color.
The goal isn't to break rules, but to see a place with fresh eyes, to find beauty in the mundane, and to capture its true character away from the tourist crush.
The Art of the Capture – Settings and Techniques
This is where your vision truly comes to life. Manual control is your best friend here.
1. Manual Mode is a Must:
- Exposure Consistency: For a smooth time-lapse, every single frame needs to have the exact same exposure. Auto modes will adjust exposure as light changes, causing flickering in your final video. Set your ISO, aperture (f/8 to f/16 for sharpness), and shutter speed manually.
- White Balance: Set this manually (e.g., "Daylight," "Cloudy") to avoid color shifts.
2. Intervalometer Settings – The Heartbeat of Your Time-Lapse: This determines how often your camera takes a picture.
- Fast-Moving Subjects (Clouds, People, Traffic): Shorter intervals (1-5 seconds).
- Slow-Moving Subjects (Sunrises/Sunsets, Stars, Plants): Longer intervals (10-30 seconds, or even minutes).
- Formula: (Desired Video Length in Seconds) x (Frames Per Second, usually 24 or 30) = Total Number of Photos.
- Example: 10-second video at 24fps = 240 photos.
- If you shoot for 2 hours (7200 seconds) with a 30-second interval: 7200 / 30 = 240 photos. Perfect!
3. Shutter Speed & Motion Blur:
- The 180-Degree Rule (adapted): For cinematic motion blur, your shutter speed should ideally be about half your interval. So, if your interval is 2 seconds, a shutter speed of 1 second will give you nice blur. If your interval is 10 seconds, a 5-second shutter speed. This is where ND filters become crucial in daylight!
- No Blur (Crisp): For star trails or very sharp images, use a faster shutter speed (e.g., 1/100 sec) with a short interval.
4. Exposure Ramping (Day-to-Night Transitions): This is the "Holy Grail" of time-lapse. It's complex but incredibly rewarding. As light changes dramatically (sunrise/sunset), you need to gradually adjust your exposure settings (ISO, shutter speed, aperture).
- Manual Ramping: You manually adjust settings every few minutes. Requires constant attention.
- Automated Ramping: Software like LRTimelapse, combined with a compatible intervalometer, can automate this process, making it much smoother.
5. Composition – Frame Your Story:
- Rule of Thirds: Place your main subjects along the intersecting lines or points.
- Leading Lines: Use roads, rivers, or architectural elements to draw the viewer's eye.
- Fore/Mid/Background: Create depth by having interesting elements at different distances.
- Movement: Think about what will move in your frame – clouds, people, cars, shadows. This is the whole point of time-lapse!
Anecdote: I remember setting up for a sunset time-lapse over the rooftops of Chefchaouen, Morocco. The light was changing rapidly, and I was manually adjusting my shutter speed every 5 minutes. A local boy, curious, sat beside me, watching the sky and my camera. When the final video showed the sky exploding in hues of orange and purple, then fading to the deep blue of twilight as the city's lights flickered on, he clapped. That shared moment, and the resulting capture, was priceless.
Post-Production Magic – Bringing It All Together
Raw photos are just the ingredients; post-production is where you bake the cake.
1. Software Essentials:
- Adobe Lightroom Classic: Indispensable for batch editing your RAW photos. You can apply color corrections, exposure adjustments, and remove dust spots to all frames simultaneously.
- LRTimelapse (Highly Recommended): This specialized software works hand-in-hand with Lightroom. It's crucial for de-flickering (removing subtle exposure changes between frames), smoothing exposure ramps, and creating professional-grade time-lapses. It costs money, but it's worth every penny if you're serious.
- Adobe After Effects / DaVinci Resolve (Free): For final assembly, stabilization, adding music, and rendering your video. DaVinci Resolve is a powerful, free alternative to After Effects.
- Smartphone Apps: If you shot on your phone, apps like InShot, CapCut, or even your phone's native editor can stitch, trim, and add music.
2. The Workflow (Simplified):
- Import & Organize: Get all your photos into Lightroom.
- Initial Edit (One Photo): Edit the first frame of your sequence to perfection (exposure, contrast, colors, sharpness).
- Sync Settings: Apply these settings to all photos in the sequence.
- LRTimelapse (if using):
- Load photos into LRTimelapse.
- Use the "Visual De-flicker" and "Holy Grail" (for day-to-night) tools. This is magic!
- Save and re-import adjustments into Lightroom.
- Final Lightroom Pass: Tweak any remaining issues, especially if you had a challenging exposure ramp.
- Export JPEGs/TIFFs: Export your sequence as high-quality JPEGs or TIFFs.
- Video Assembly: Import your image sequence into After Effects or DaVinci Resolve.
- Set frame rate (24 or 30 fps).
- Add music (royalty-free is best for sharing!).
- Apply minor stabilization if needed (warp stabilizer in AE, or built-in in Resolve).
- Color grade for a consistent look.
- Render: Export your final video in a high-quality format (e.g., H.264 MP4).
3. Music – The Emotional Punch:
- Choose music that complements the mood and pace of your time-lapse. Upbeat for cityscapes, serene for nature, epic for stars.
- Use royalty-free music from sites like Epidemic Sound, Artlist, or YouTube's Audio Library to avoid copyright issues, especially if you plan to share widely.
Respecting the Scene – Ethical Time-Lapsing
While the thrill of finding a "secret" spot is undeniable, always remember to be a responsible traveler and photographer.
- Private Property: Never trespass. If you want to shoot from a private rooftop or balcony, always ask permission.
- Public Spaces: Be mindful of others. Don't block pathways, set up in inconvenient locations, or disturb local activities. A small footprint is key.
- Leave No Trace: Pack out everything you pack in. Don't leave trash or disturb natural environments.
- Cultural Sensitivity: In some cultures, photographing people without permission is considered rude or offensive. Be aware of local customs. If people are in your shot, ensure they are part of a wider scene and not the sole focus, or simply ask first.
- Safety First: Don't put yourself in dangerous situations for a shot. That stunning cliff edge or busy intersection isn't worth it.
I once found a fantastic viewpoint overlooking a small fishing village in Portugal. I set up my camera, but noticed a few local fishermen giving me wary glances. Instead of ignoring them, I packed up my gear, walked over, and politely asked (in broken Portuguese) if it was okay to photograph. They smiled, nodded, and even pointed out an even better spot nearby! A little respect goes a long way.
Advanced Techniques & Creative Ideas
Once you've mastered the basics, you can experiment with more advanced techniques:
- Hyperlapse: A time-lapse where the camera itself is moving. You physically walk, taking a photo every few steps, then stitch them together. Requires careful planning and stabilization in post, but the results are incredibly dynamic. Imagine walking through a bustling market, capturing the entire street in a few seconds!
- Astro Time-Lapse: Capturing star trails, the Milky Way, or meteor showers. This requires dark skies (away from light pollution), a wide-angle lens, and specific settings (wide aperture, high ISO, longer shutter speed, often 20-30 second exposures).
- Motion Control: Using a motorized slider or pan/tilt head to add subtle, repeatable camera movement during your time-lapse. This adds a professional, cinematic polish.
The World is Waiting – Go Create!
Time-lapse isn't just a technical skill; it's a way of seeing. It forces you to slow down, observe, and appreciate the subtle dance of life around you. By seeking out those unique, less-photographed spots, by understanding the rhythm of a place, you'll create something truly special – a visual story that transcends the typical tourist snapshot.
So, next time you're packing your bags, throw in that tripod and intervalometer. Look beyond the obvious. Talk to a local, wander down an unknown alley, or set your alarm for pre-dawn. The world is moving, constantly changing, and with time-lapse, you have the power to capture its fleeting beauty in a way that will captivate, inspire, and maybe even make a few locals wonder how you found that spot.
Now go forth, explore, and share your incredible time-lapse adventures with us using #TripsoraTimeLapse! We can't wait to see the world through your unique lens.
---